GitLab CI
You can use Phase to sync secrets to GitLab CI/CD Variables, either for all environments or scoped to specific GitLab environments.
When secret syncing is enabled, secrets stored inside Phase will be treated as the source of truth. Any secrets on the target service will be overwritten or deleted. Please import your secrets into Phase before continuing.
Prerequisites
- Sign up for the Phase Console and create an App.
- Enable Server-side Encryption (SSE) for the App from the Settings tab.
Step 1: Authenticate with GitLab
Token Types for Authentication
You can use two types of tokens to authenticate Phase with GitLab: Personal Access Token (PAT) and Group Access Token.
Personal Access Token (PAT)
A Personal Access Token (PAT) is tied to an individual user's GitLab account. While this can be convenient for personal projects, it has some significant drawbacks:
- User Dependency: If the user who created the PAT is removed from a group or deletes their account, the integration using that token will break.
- Scope Limitation: The token's permissions are limited to the user's access level.
Group Access Token (GAT)
A Group Access Token is associated with a GitLab group rather than an individual user. This method is more robust for team and organizational use:
- Resilience: The token remains valid as long as the group exists, regardless of changes to individual user accounts.
- Consistent Access: All members of the group can use the token for authentication, ensuring continuous integration.
Availability of Group Access Tokens
- GitLab.com: Group access tokens are available for users with the Premium or Ultimate license tiers. They are not available with a trial license.
- GitLab Dedicated and Self-Managed Instances: Group access tokens are available with any license tier.
Given these factors, it is recommended to use Group Access Tokens for authenticating Phase with GitLab to ensure stable and continuous integration, especially in team or organizational environments.
Create a Personal Access Token (PAT)
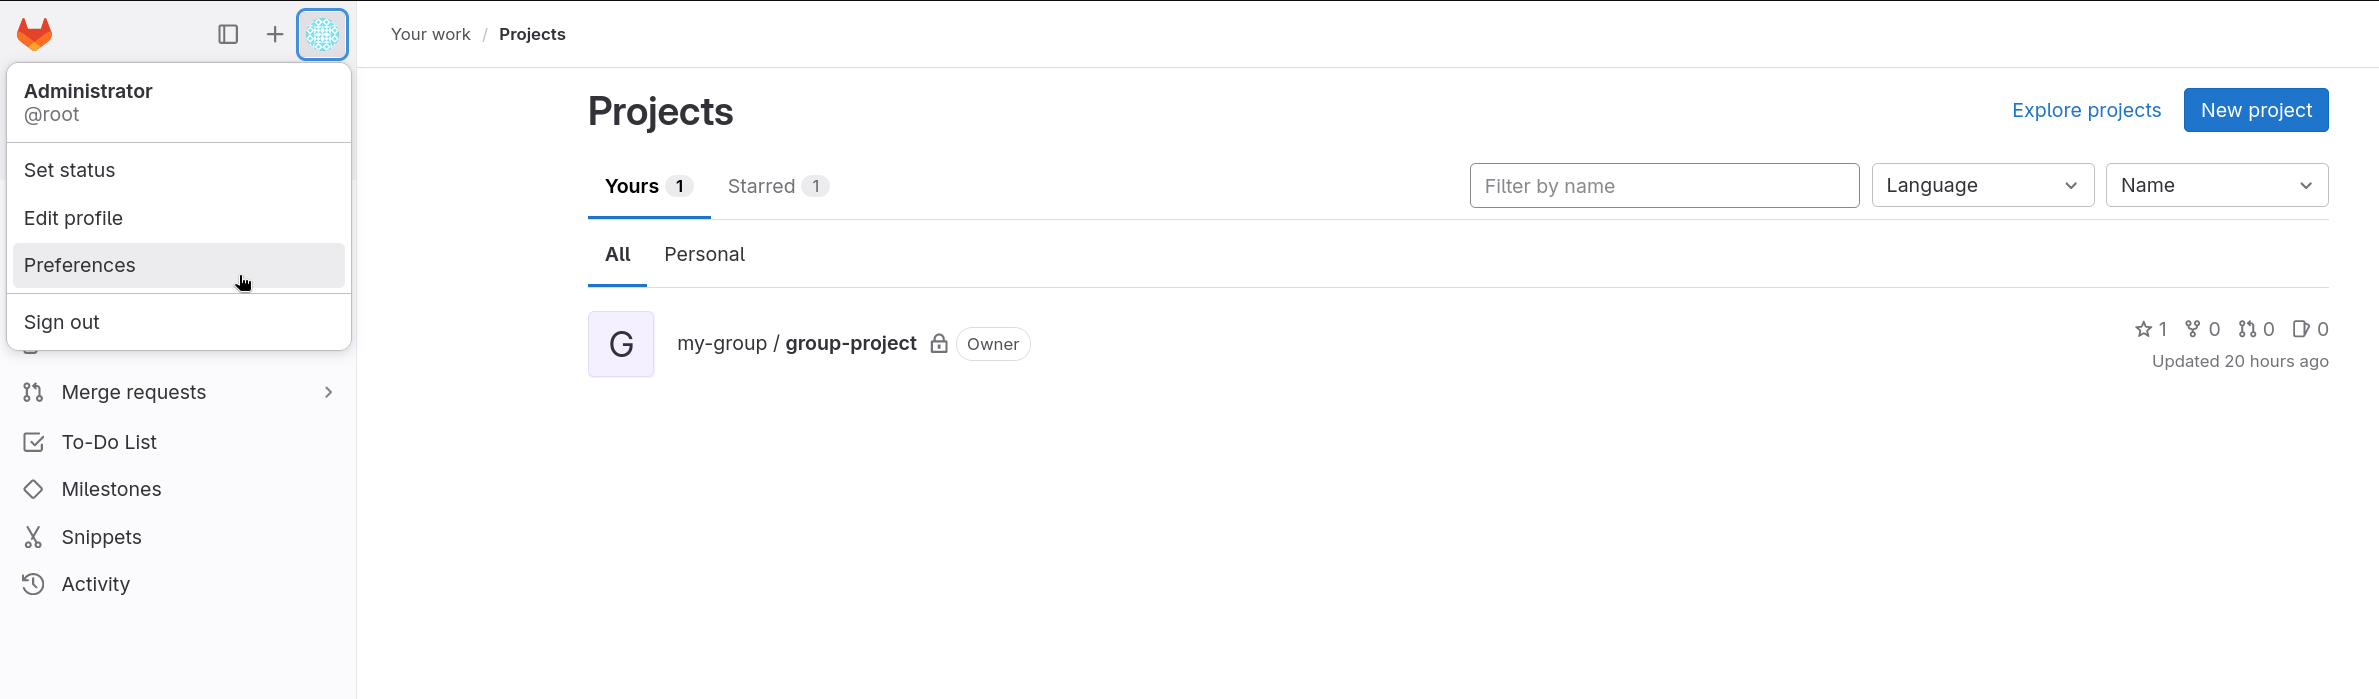
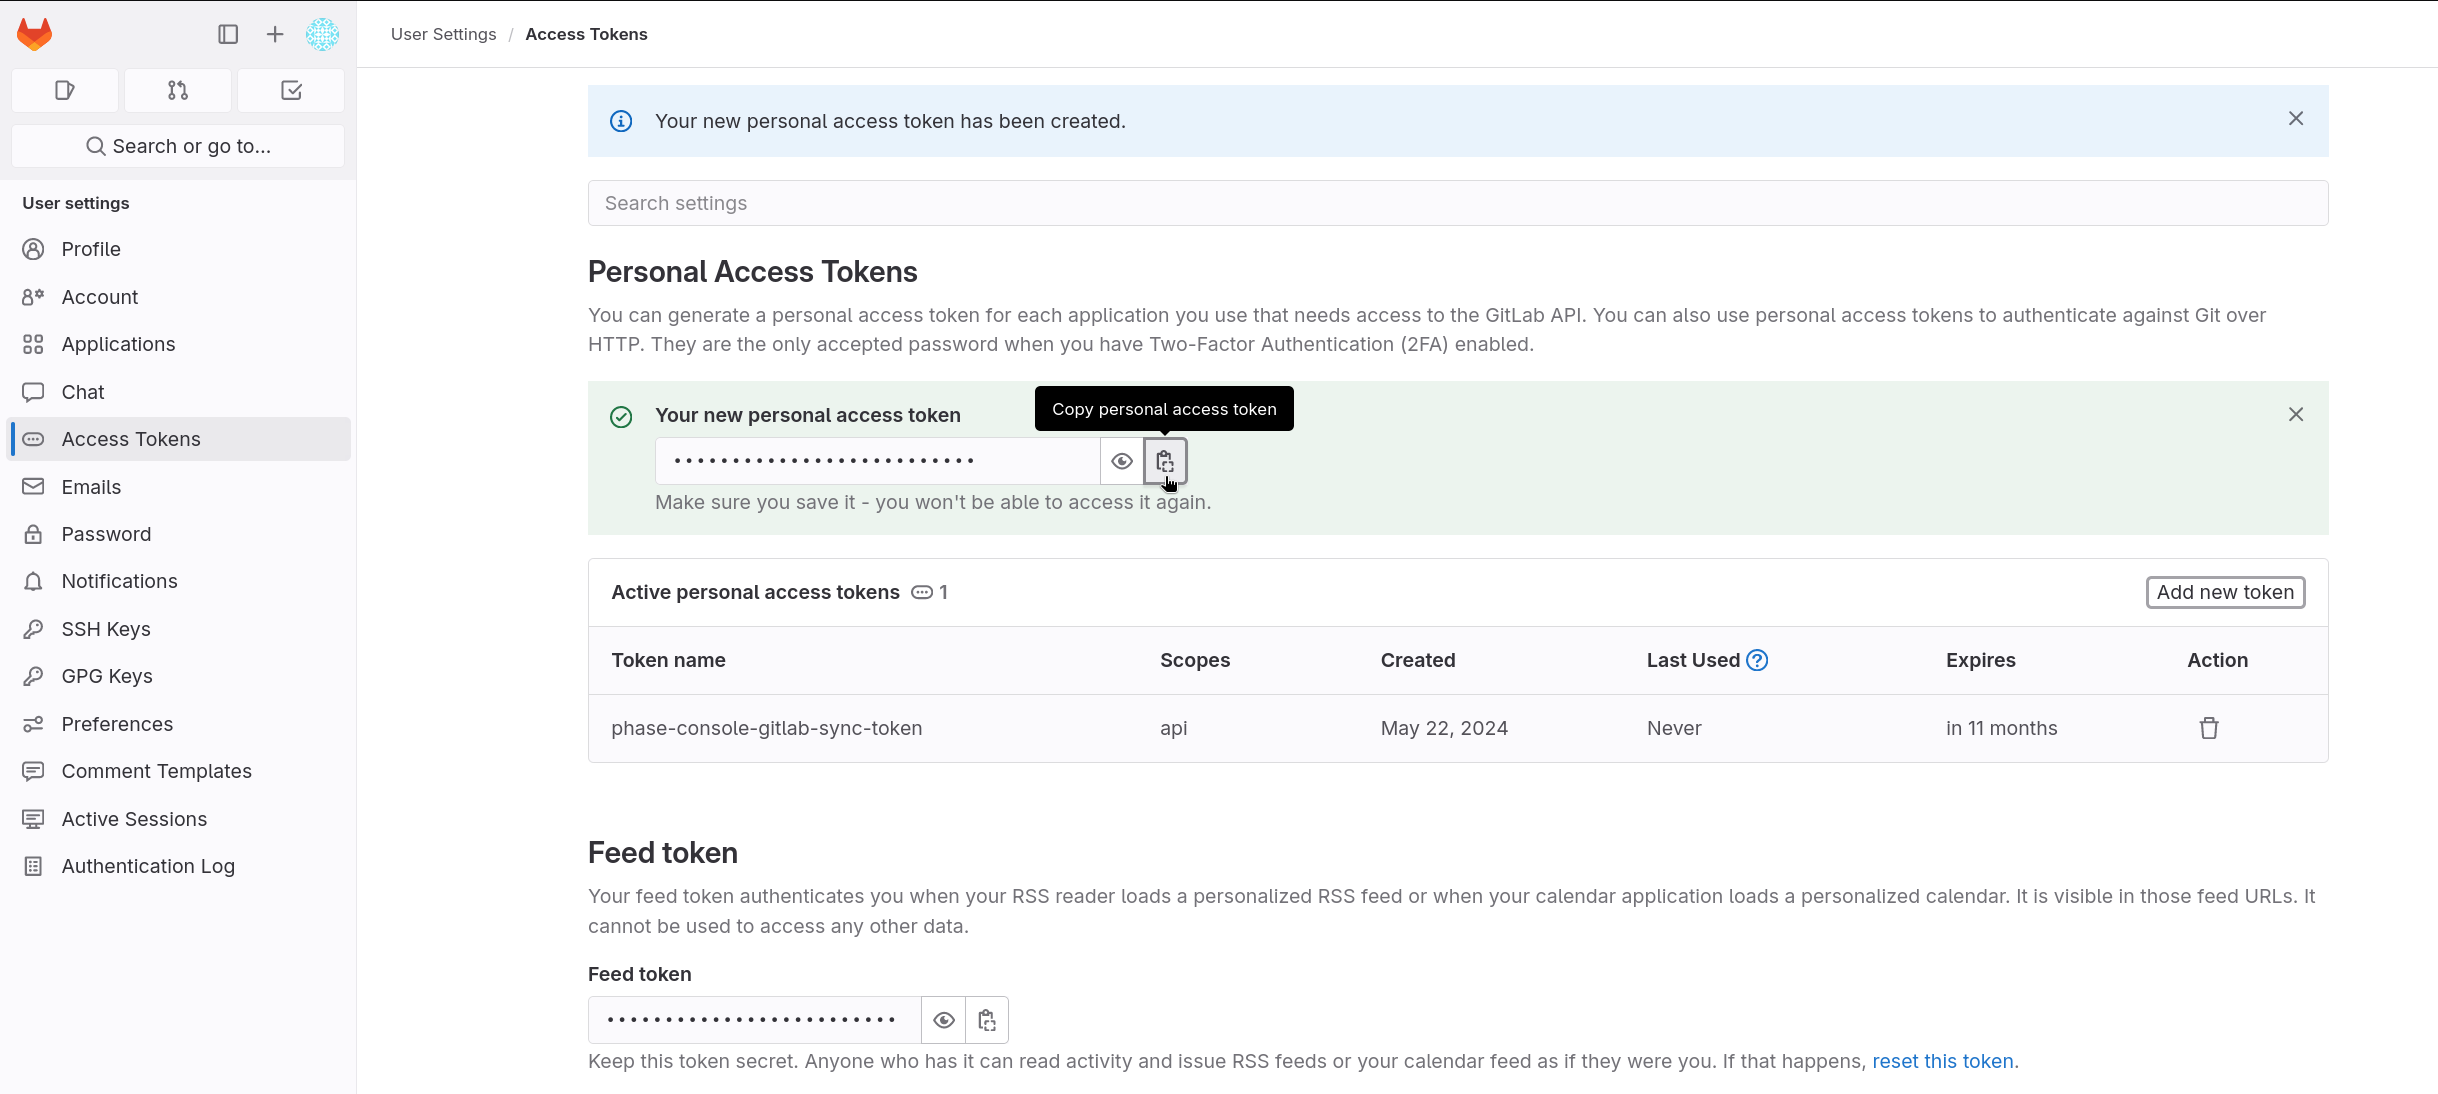
- Go to User Settings from the sidebar and click on Access Tokens.
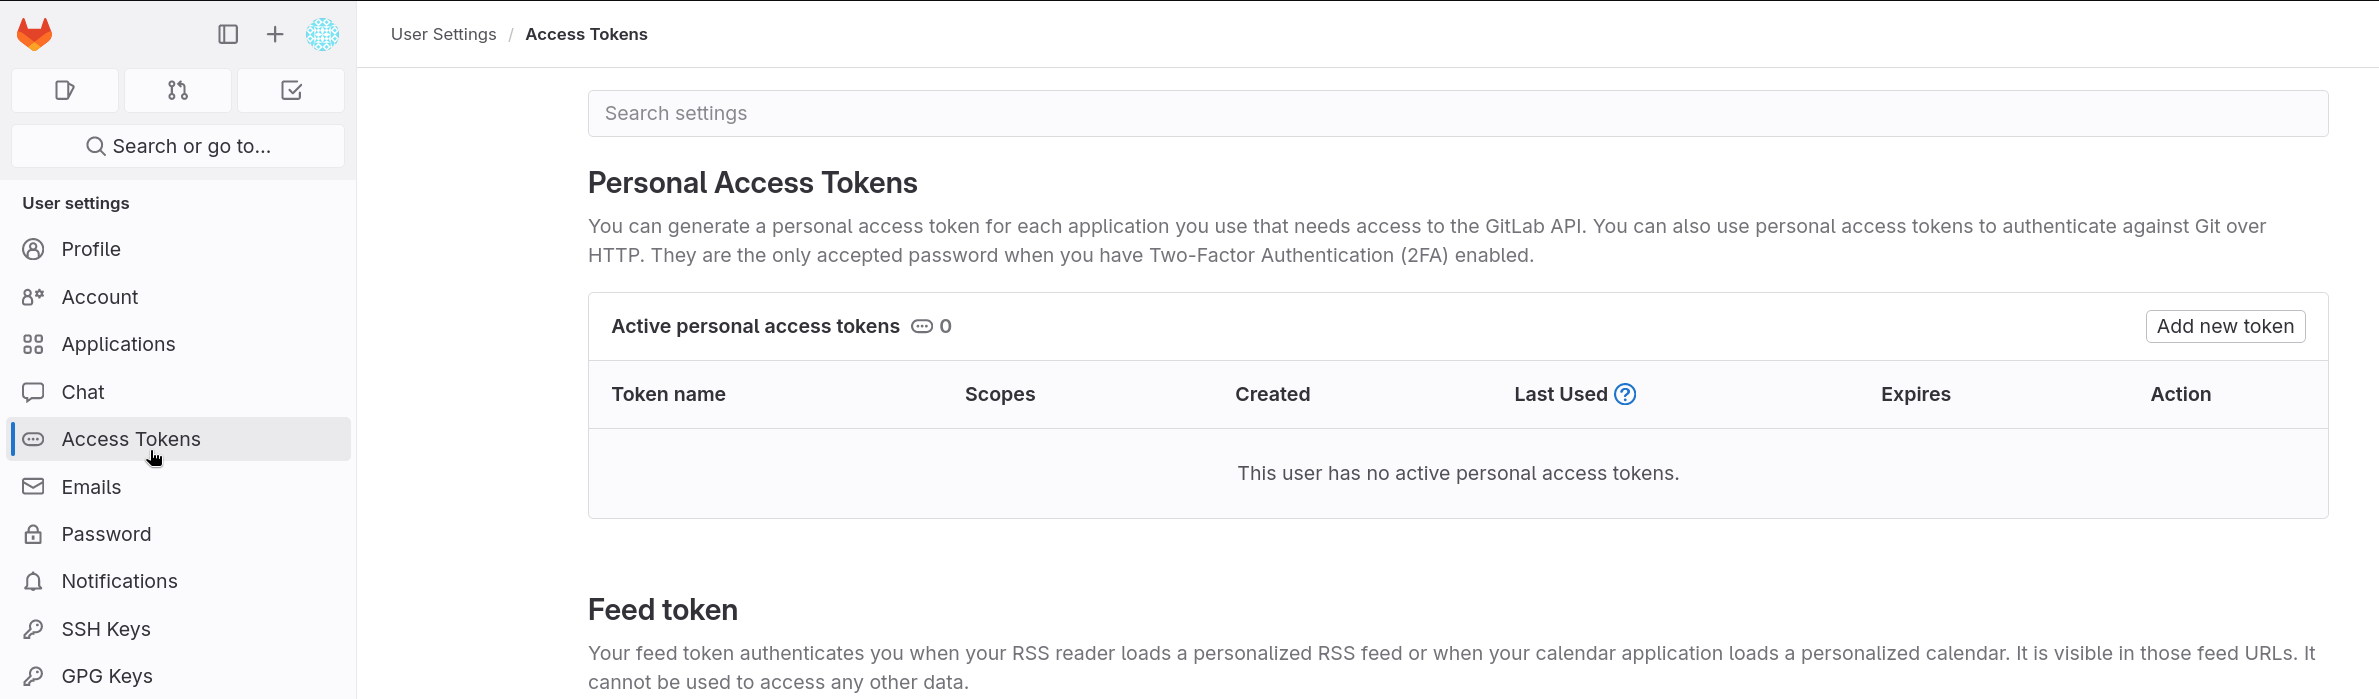
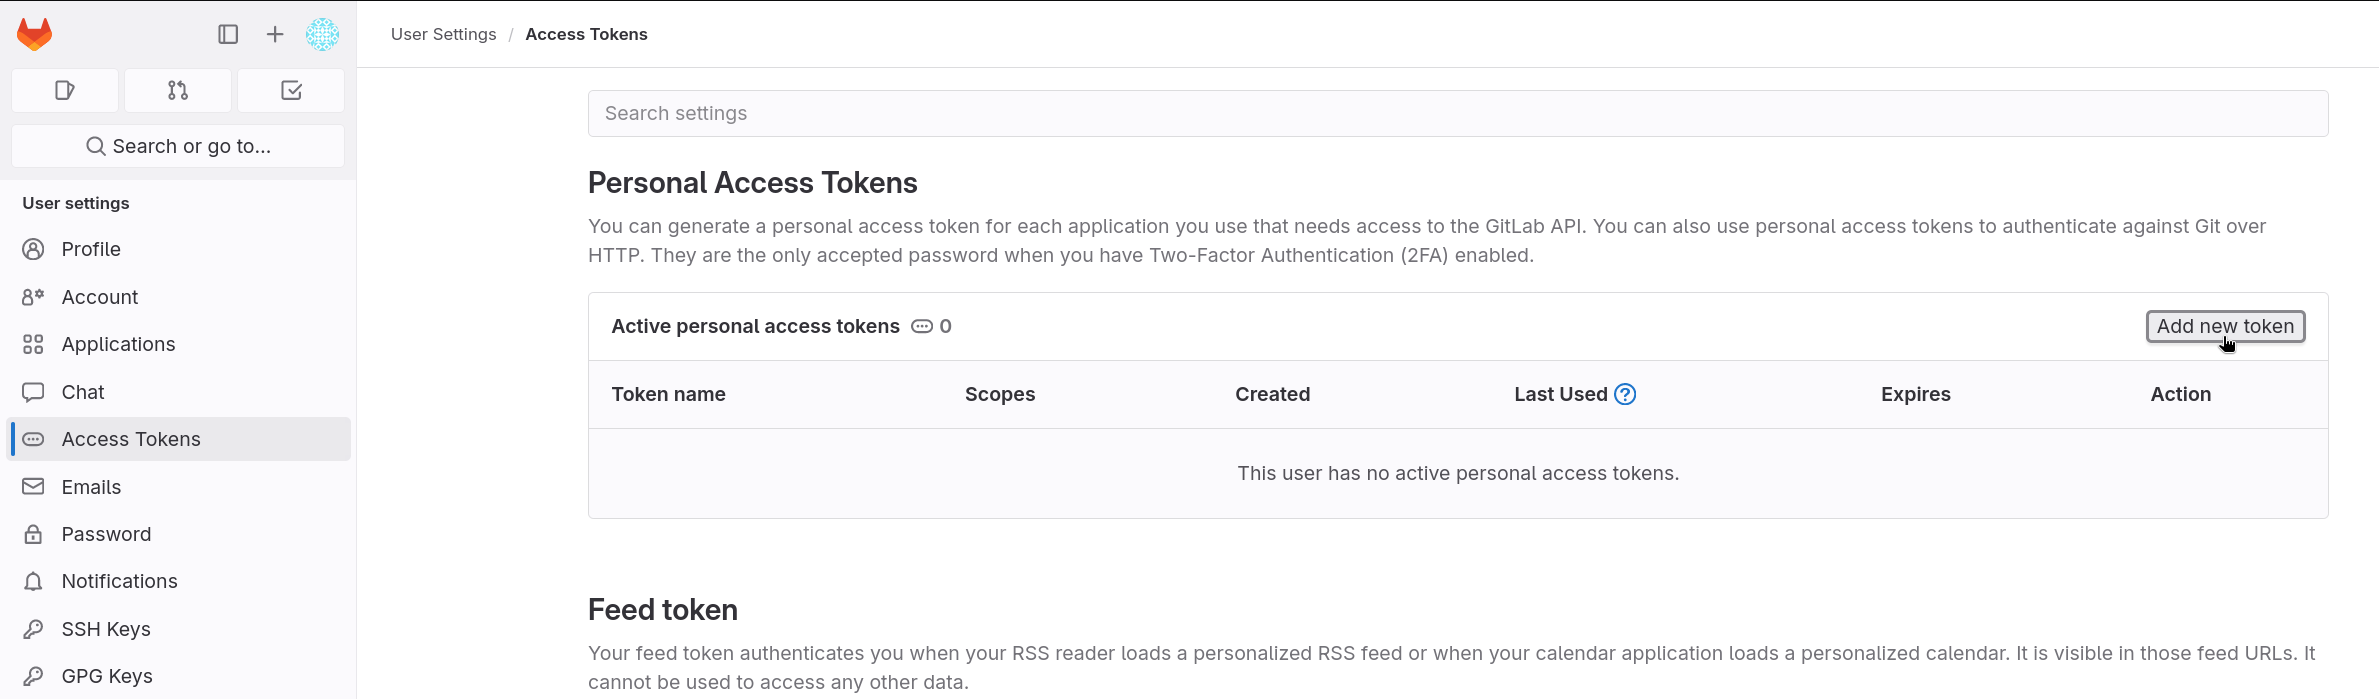
- Click on Add new token.
- Fill in the Token name, set the
apiScope, and set the Expiration date.
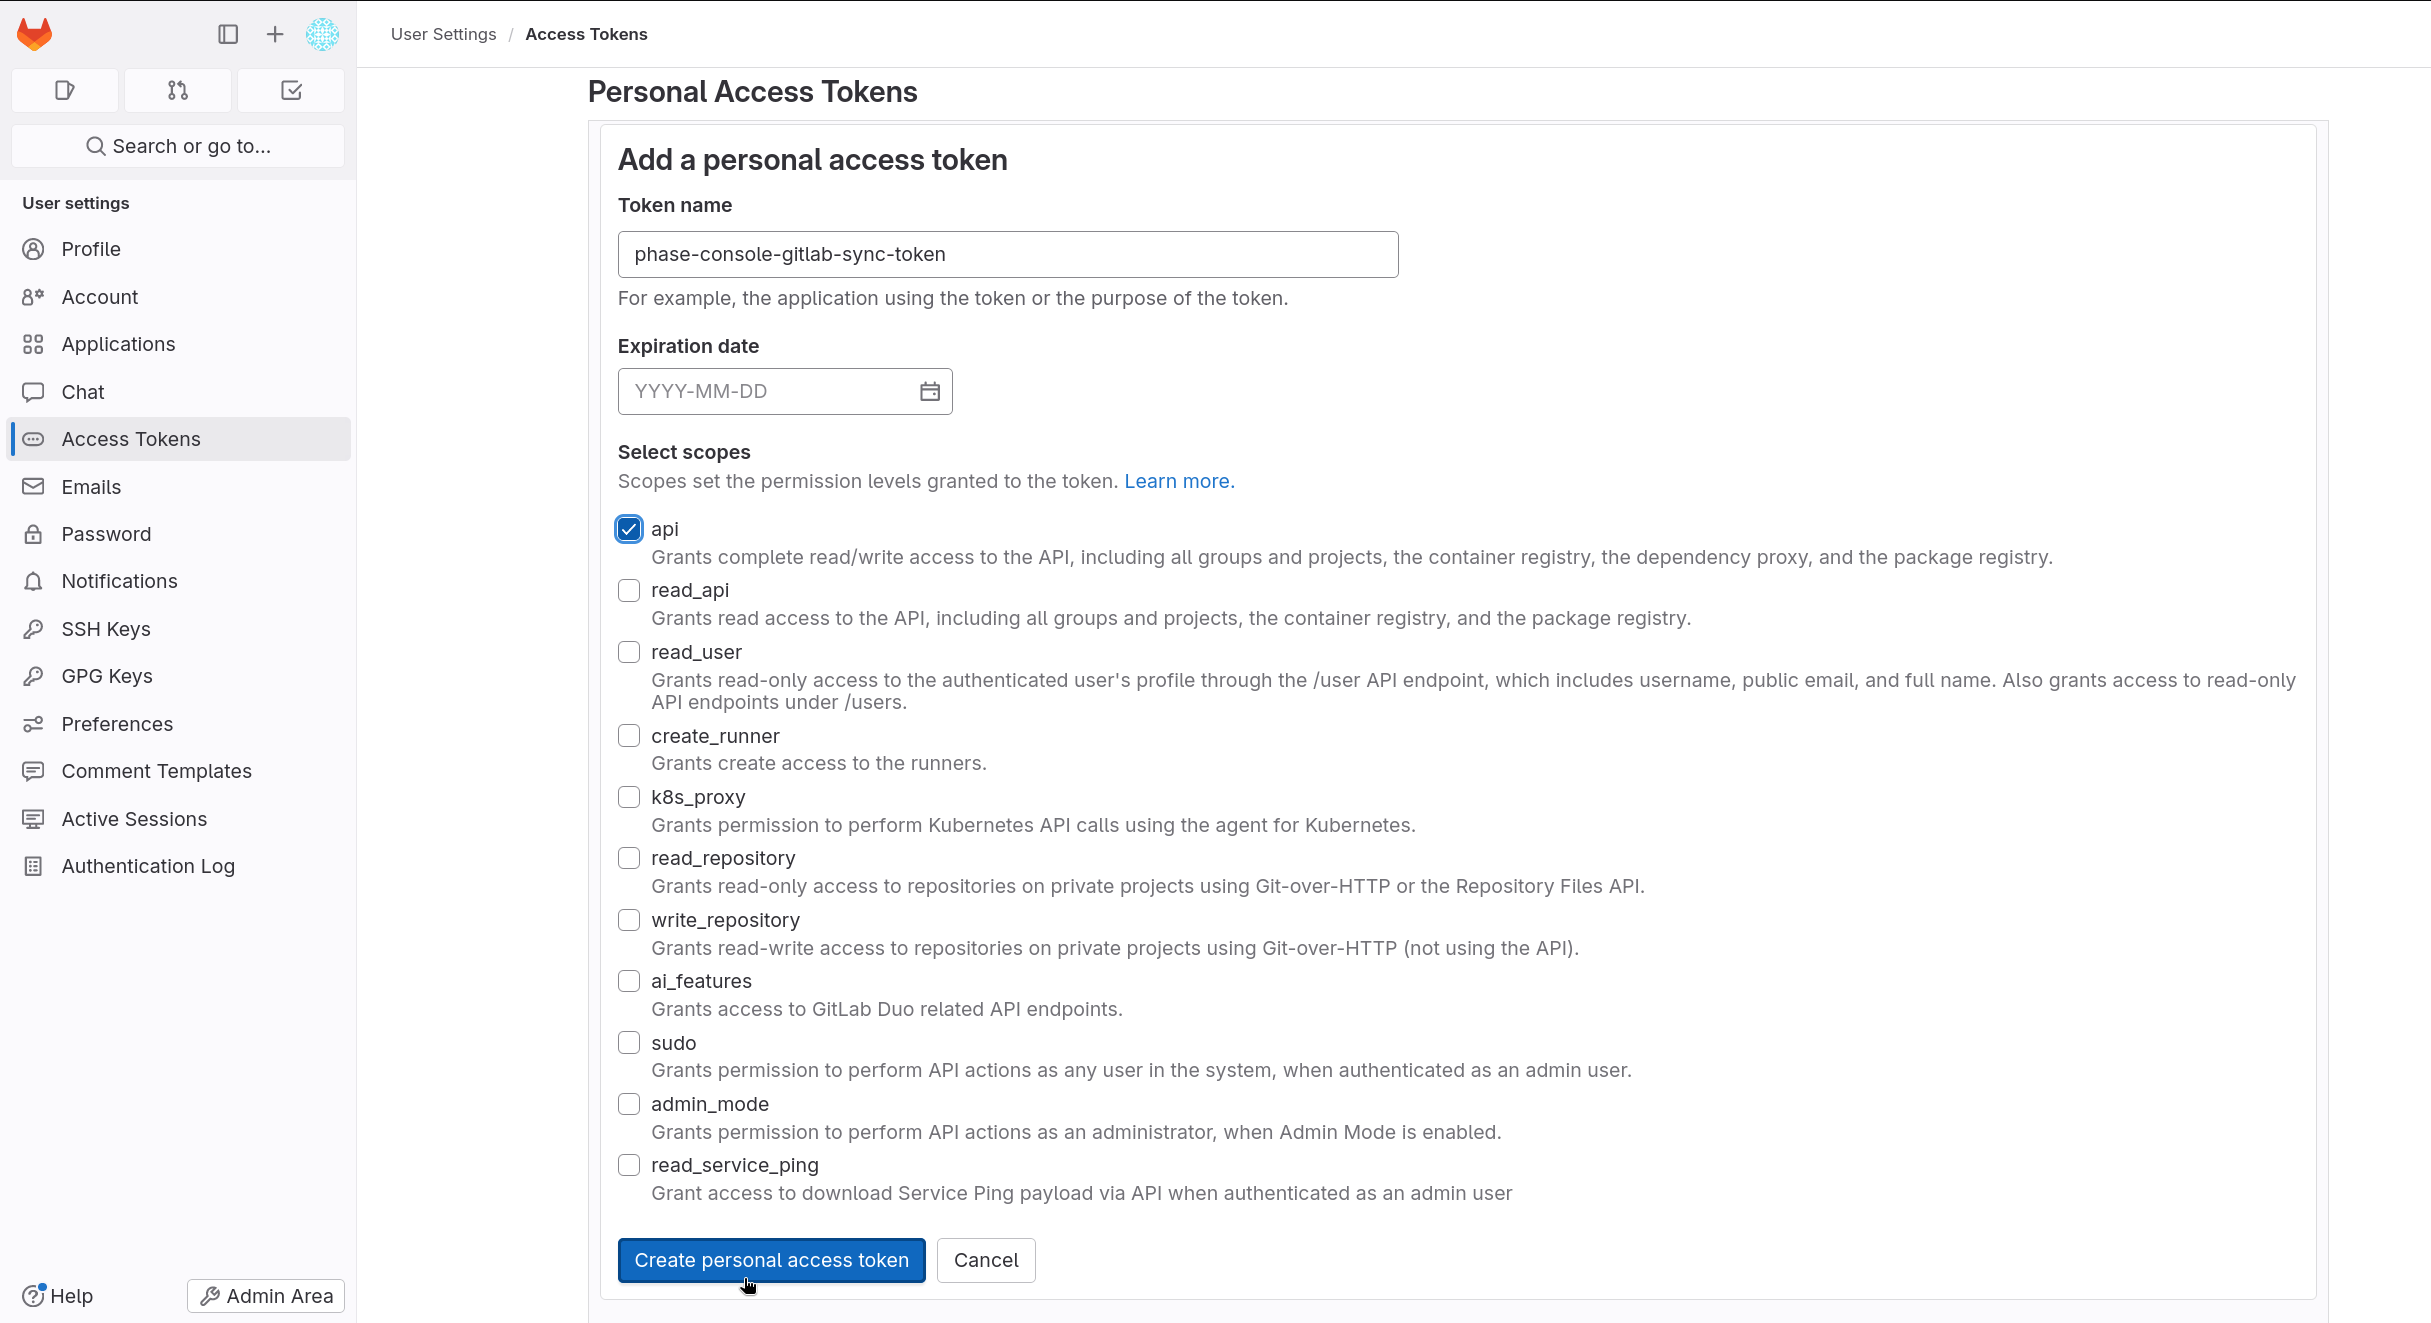
If you leave the Expiration date blank, GitLab will create a token with a
12-month expiry by default. Ensure you set an appropriate expiration date to
prevent the token from expiring unexpectedly. Also, ensure the api scope is
selected to allow necessary permissions for Phase integration.
- Click Create personal access token and copy the token.
Create a Group Access Token (GAT)
This feature is only available on GitLab if you have the Premium or Ultimate license tier. Group access tokens are not available with a trial license. On GitLab Dedicated and self-managed instances, you can use group access tokens with any license tier.
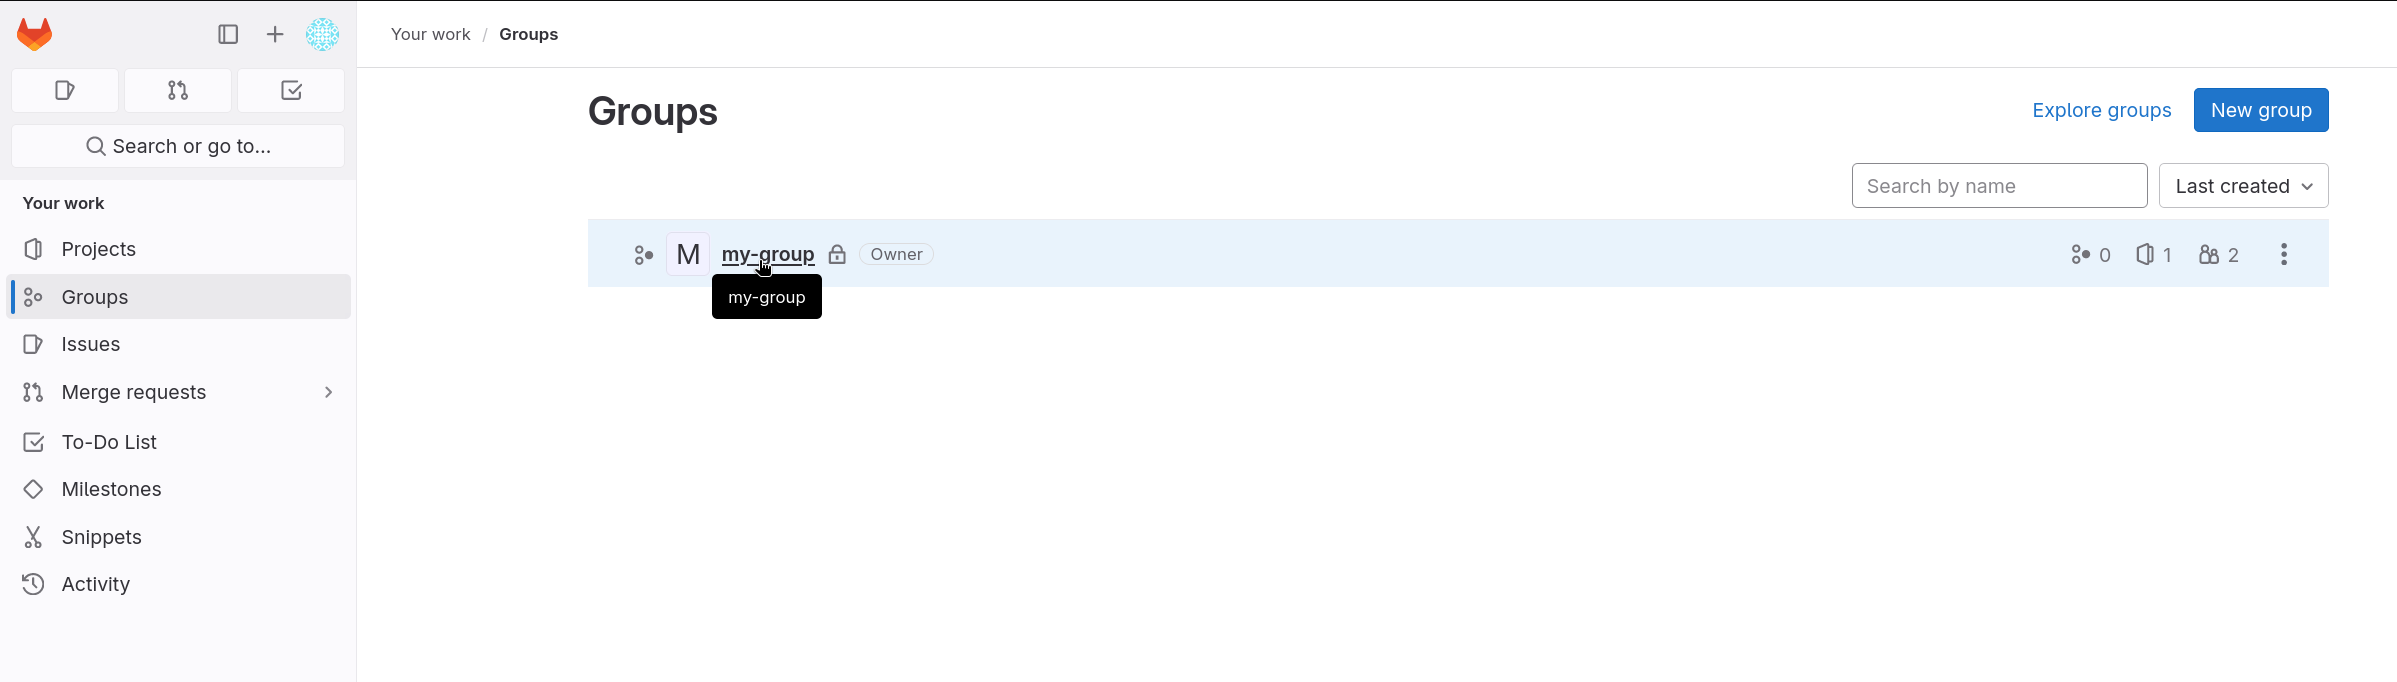
- Go to your GitLab Group.
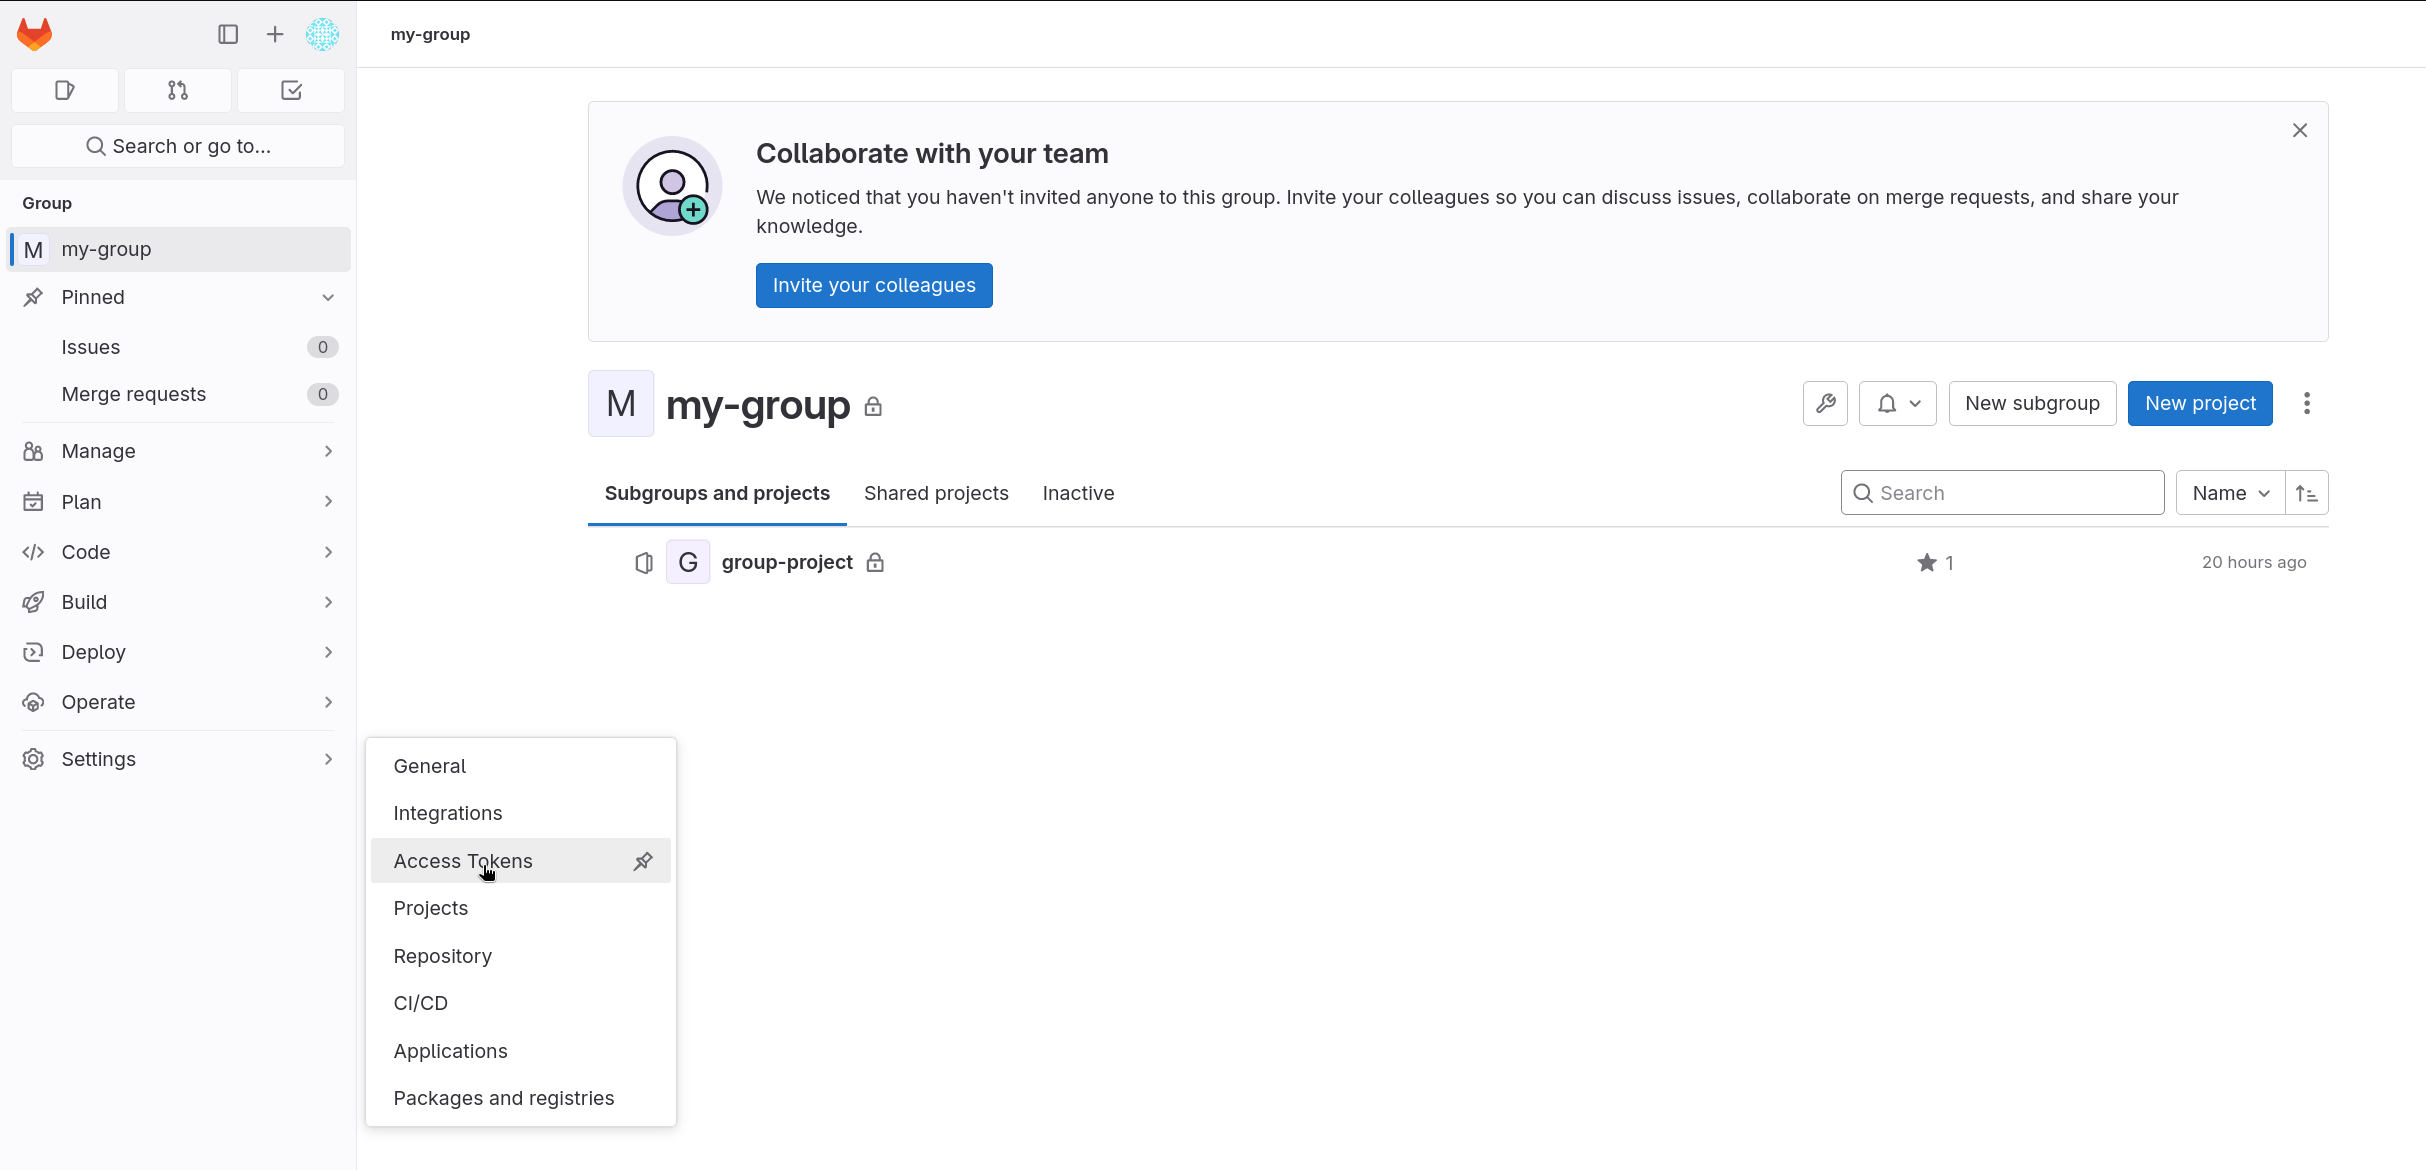
- Navigate to Settings > Access Tokens.
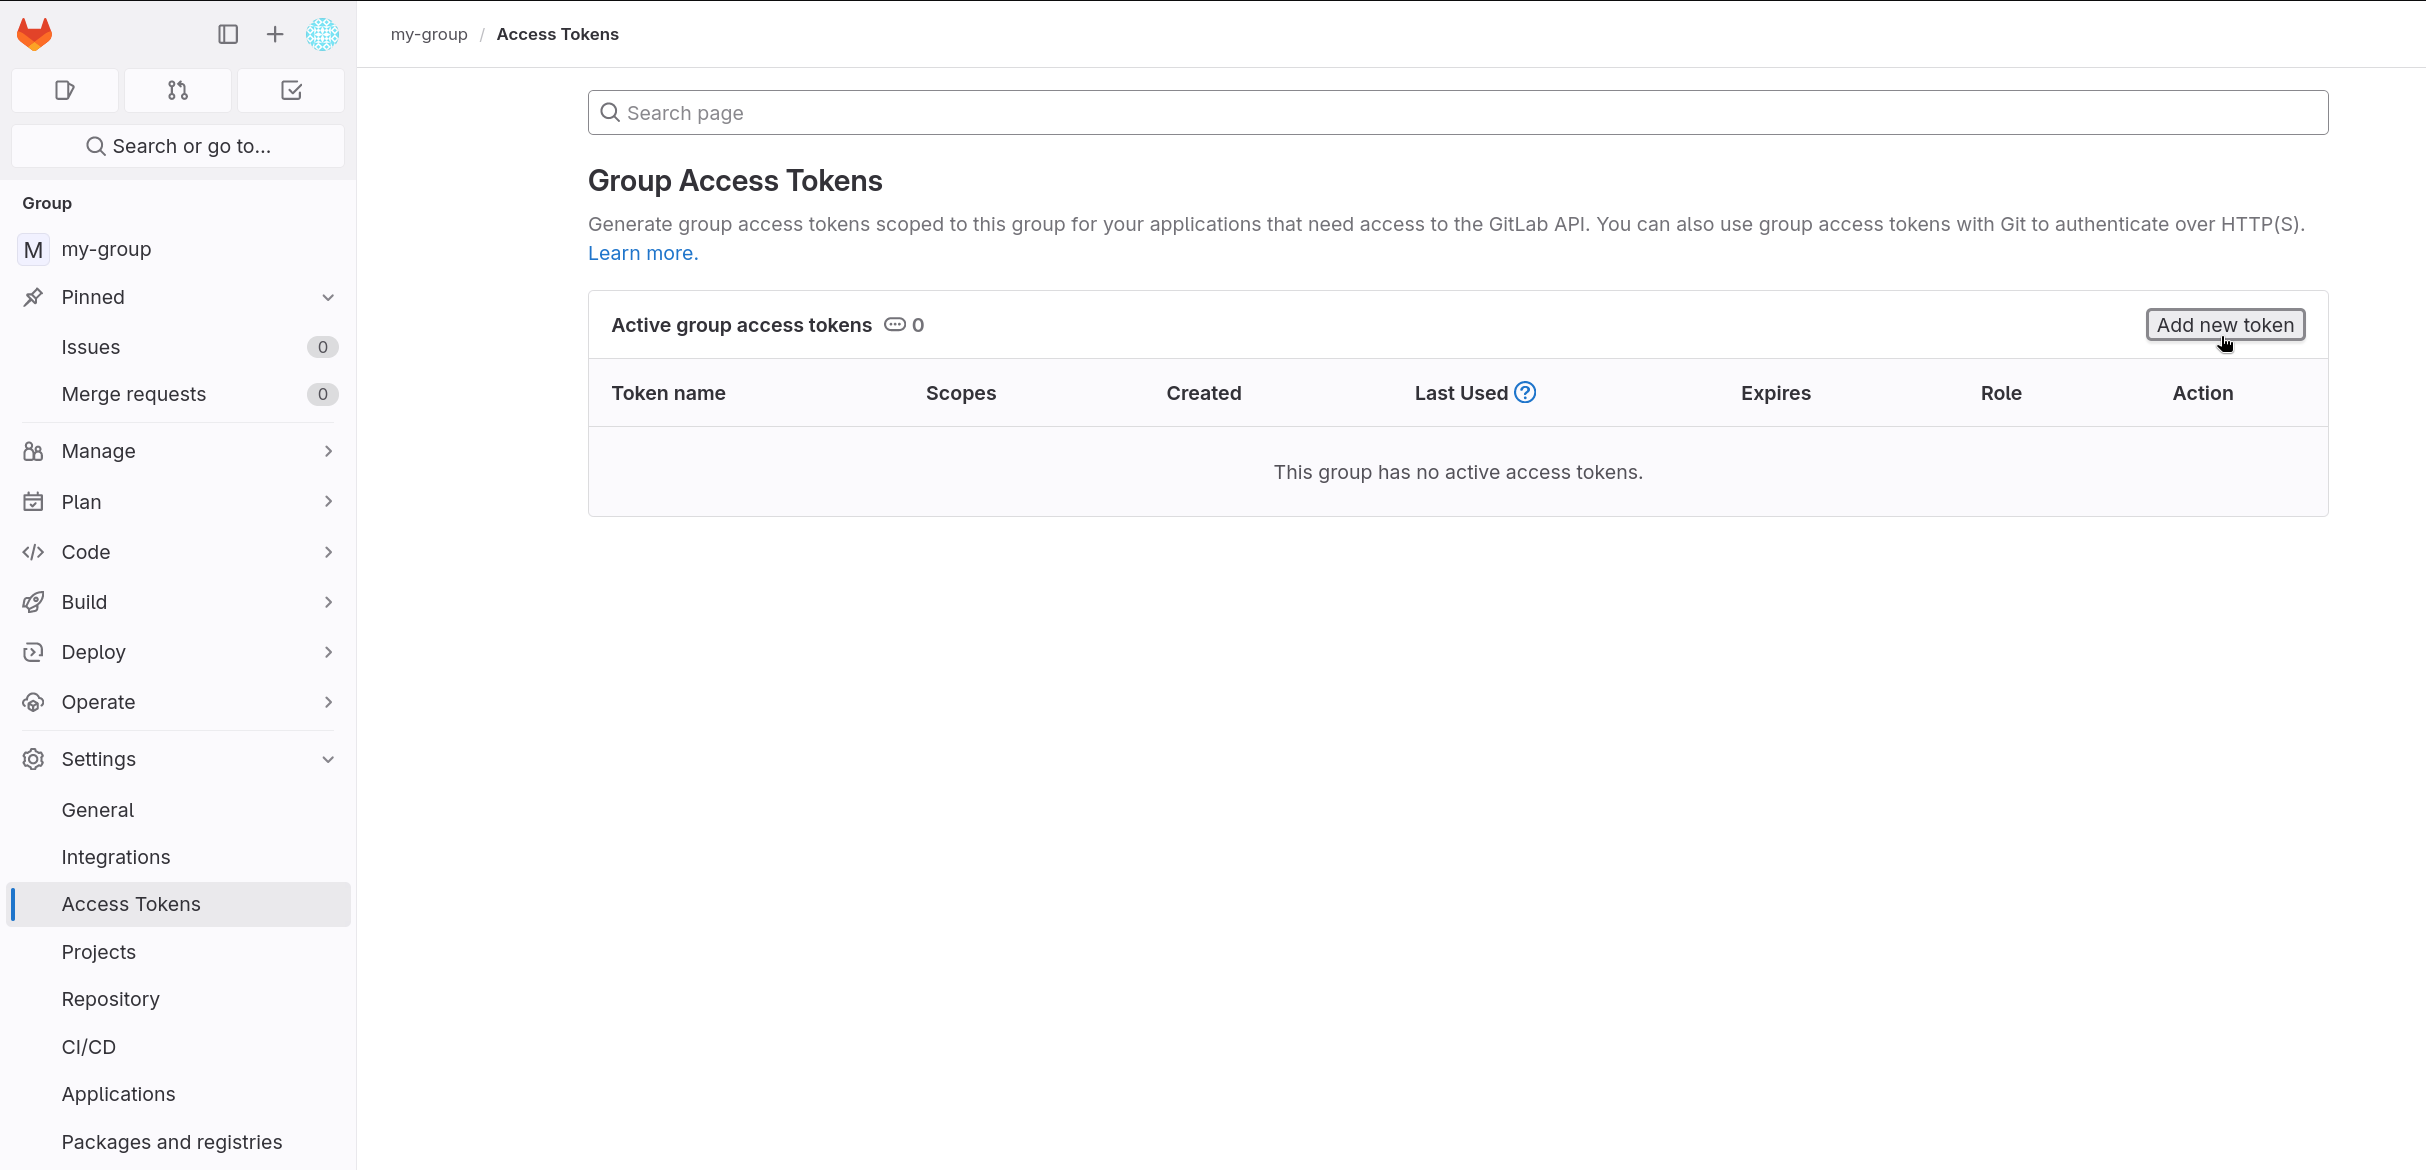
- Click on Add new token.
- Fill in the Token name, select the
OwnerRole, set theapiScope, and set the Expiration date.
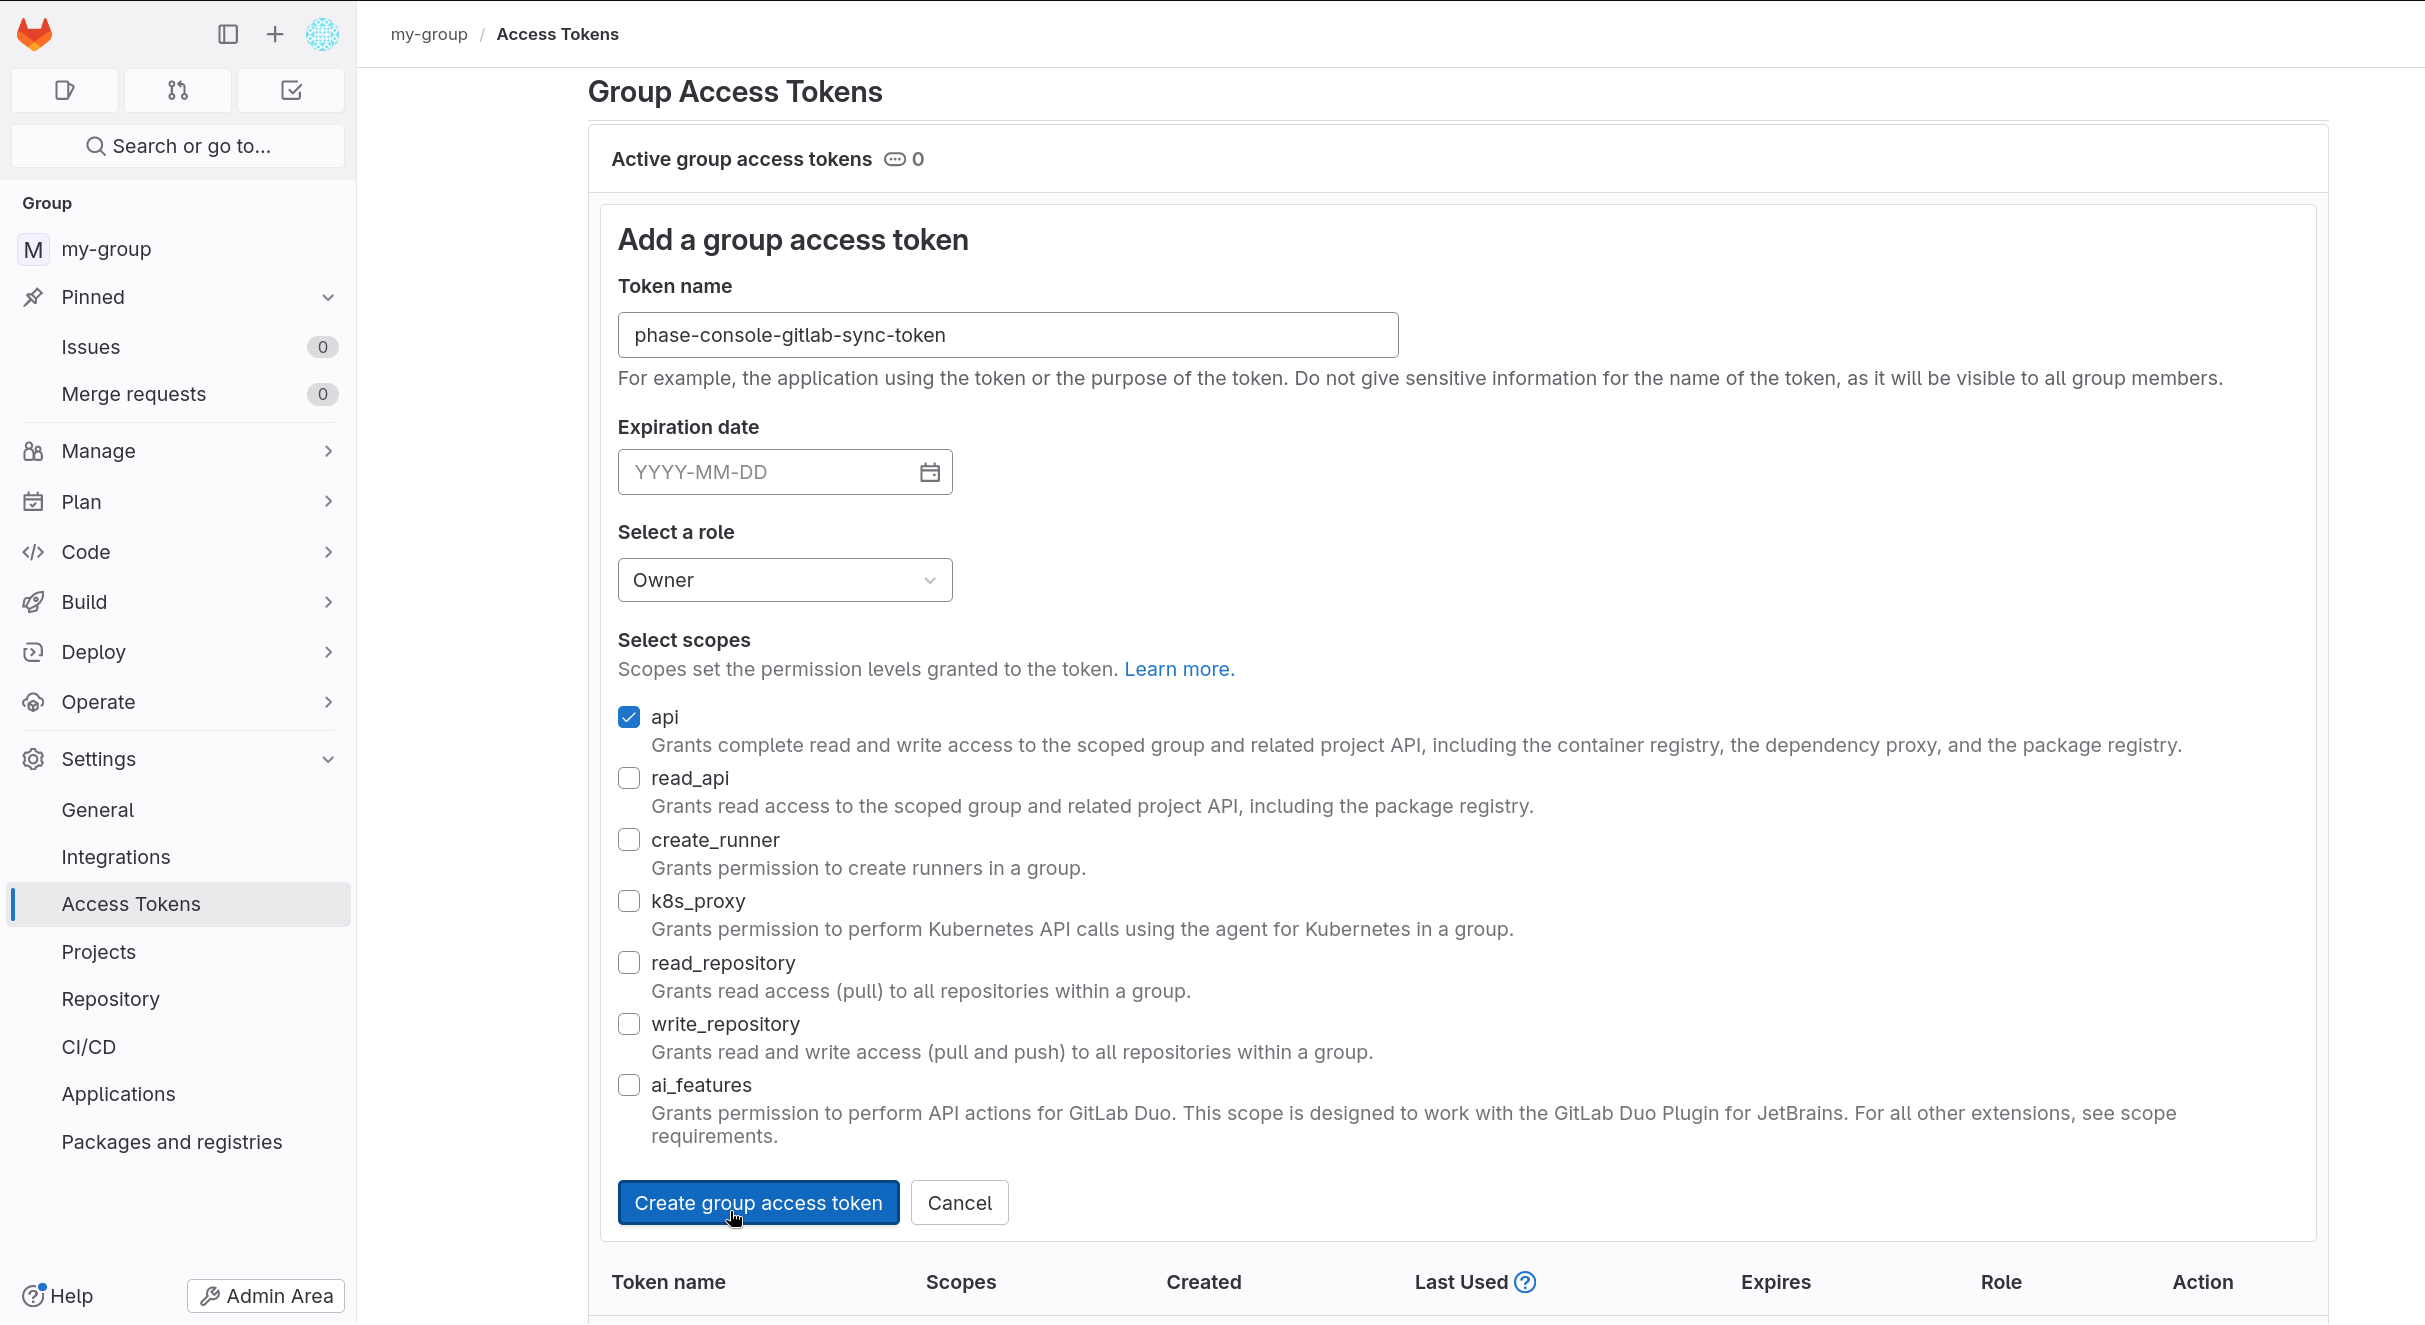
If you leave the Expiration date blank, GitLab will create a token with a
12-month expiry by default. Ensure you set an appropriate expiration date to
prevent the token from expiring unexpectedly. Also, ensure the api scope is
selected to allow necessary permissions for Phase integration.
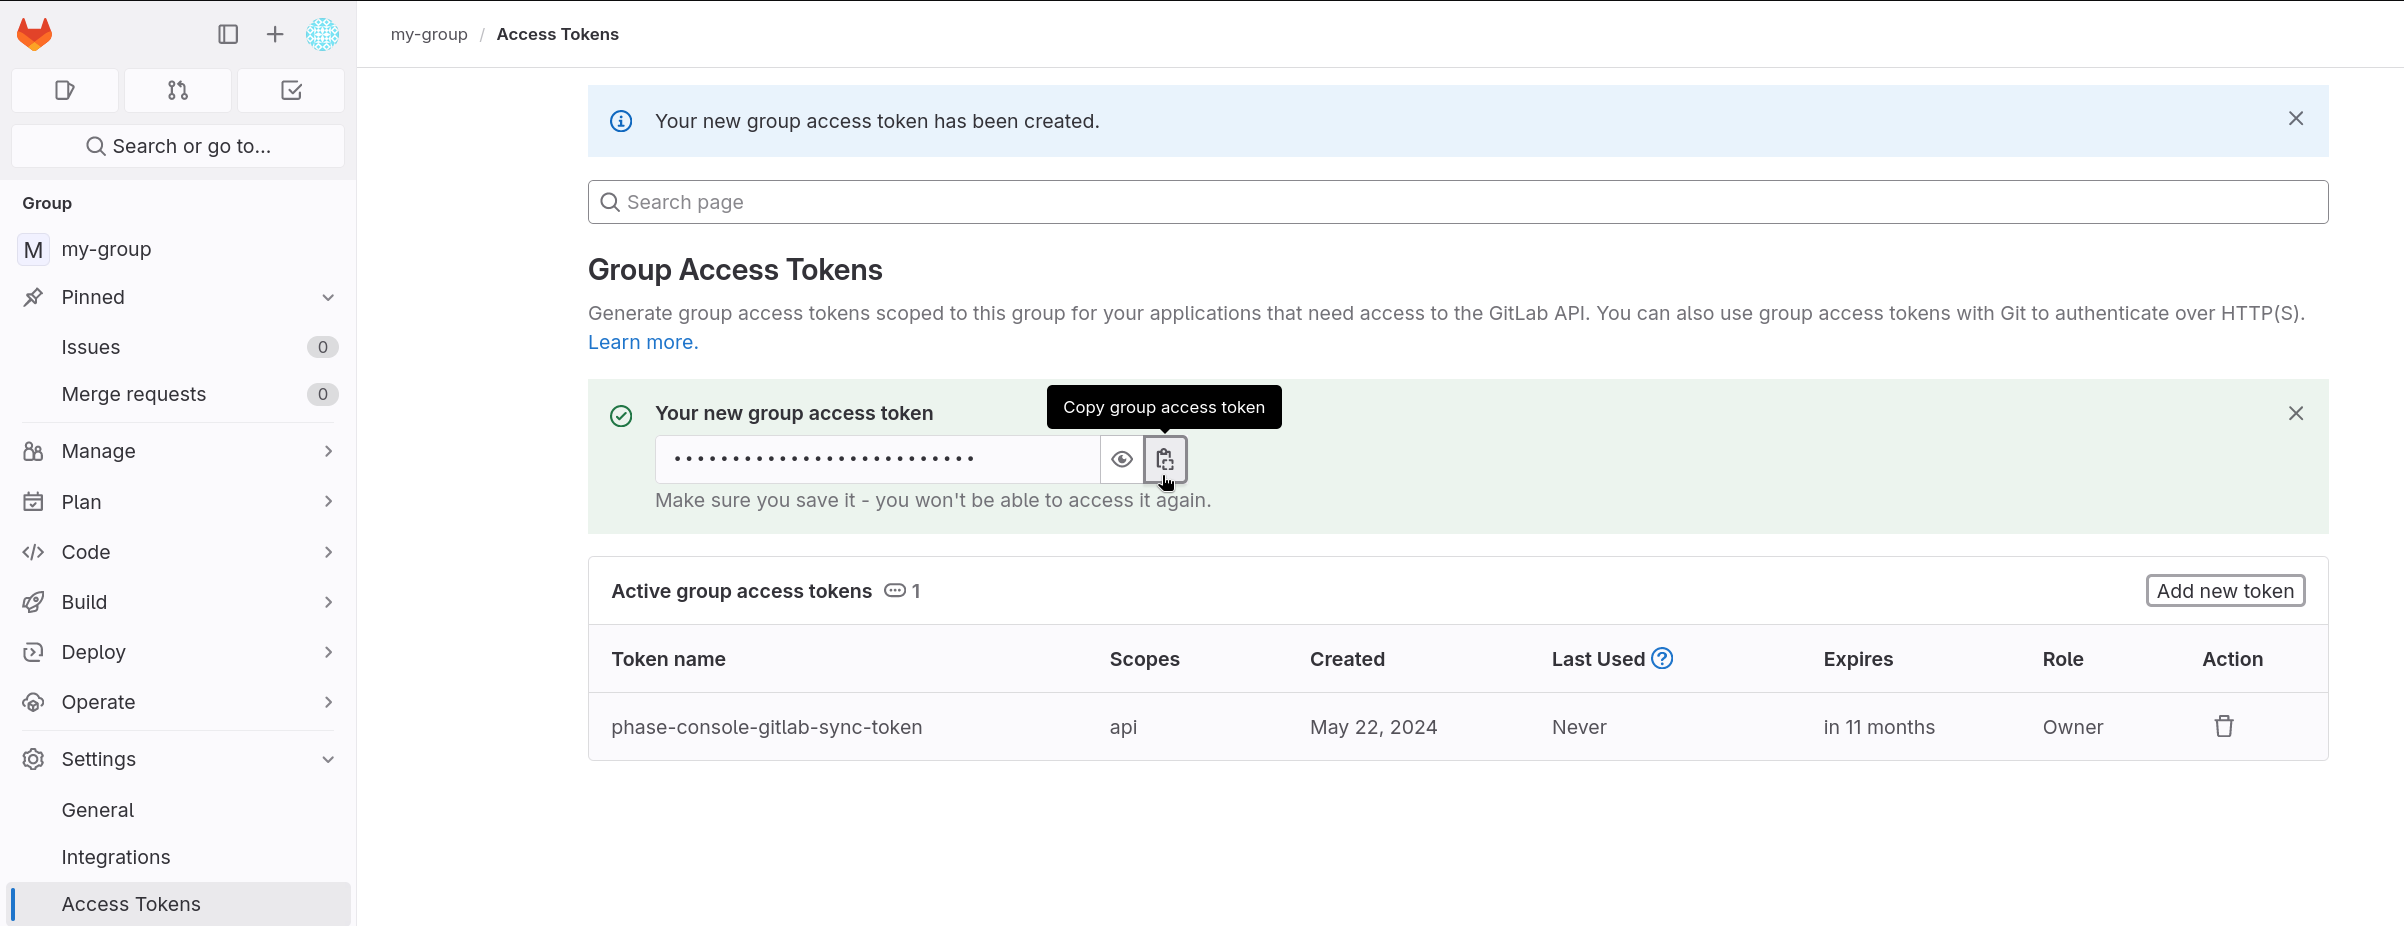
- Click Create group access token and copy the token.
Store authentication credentials in Phase
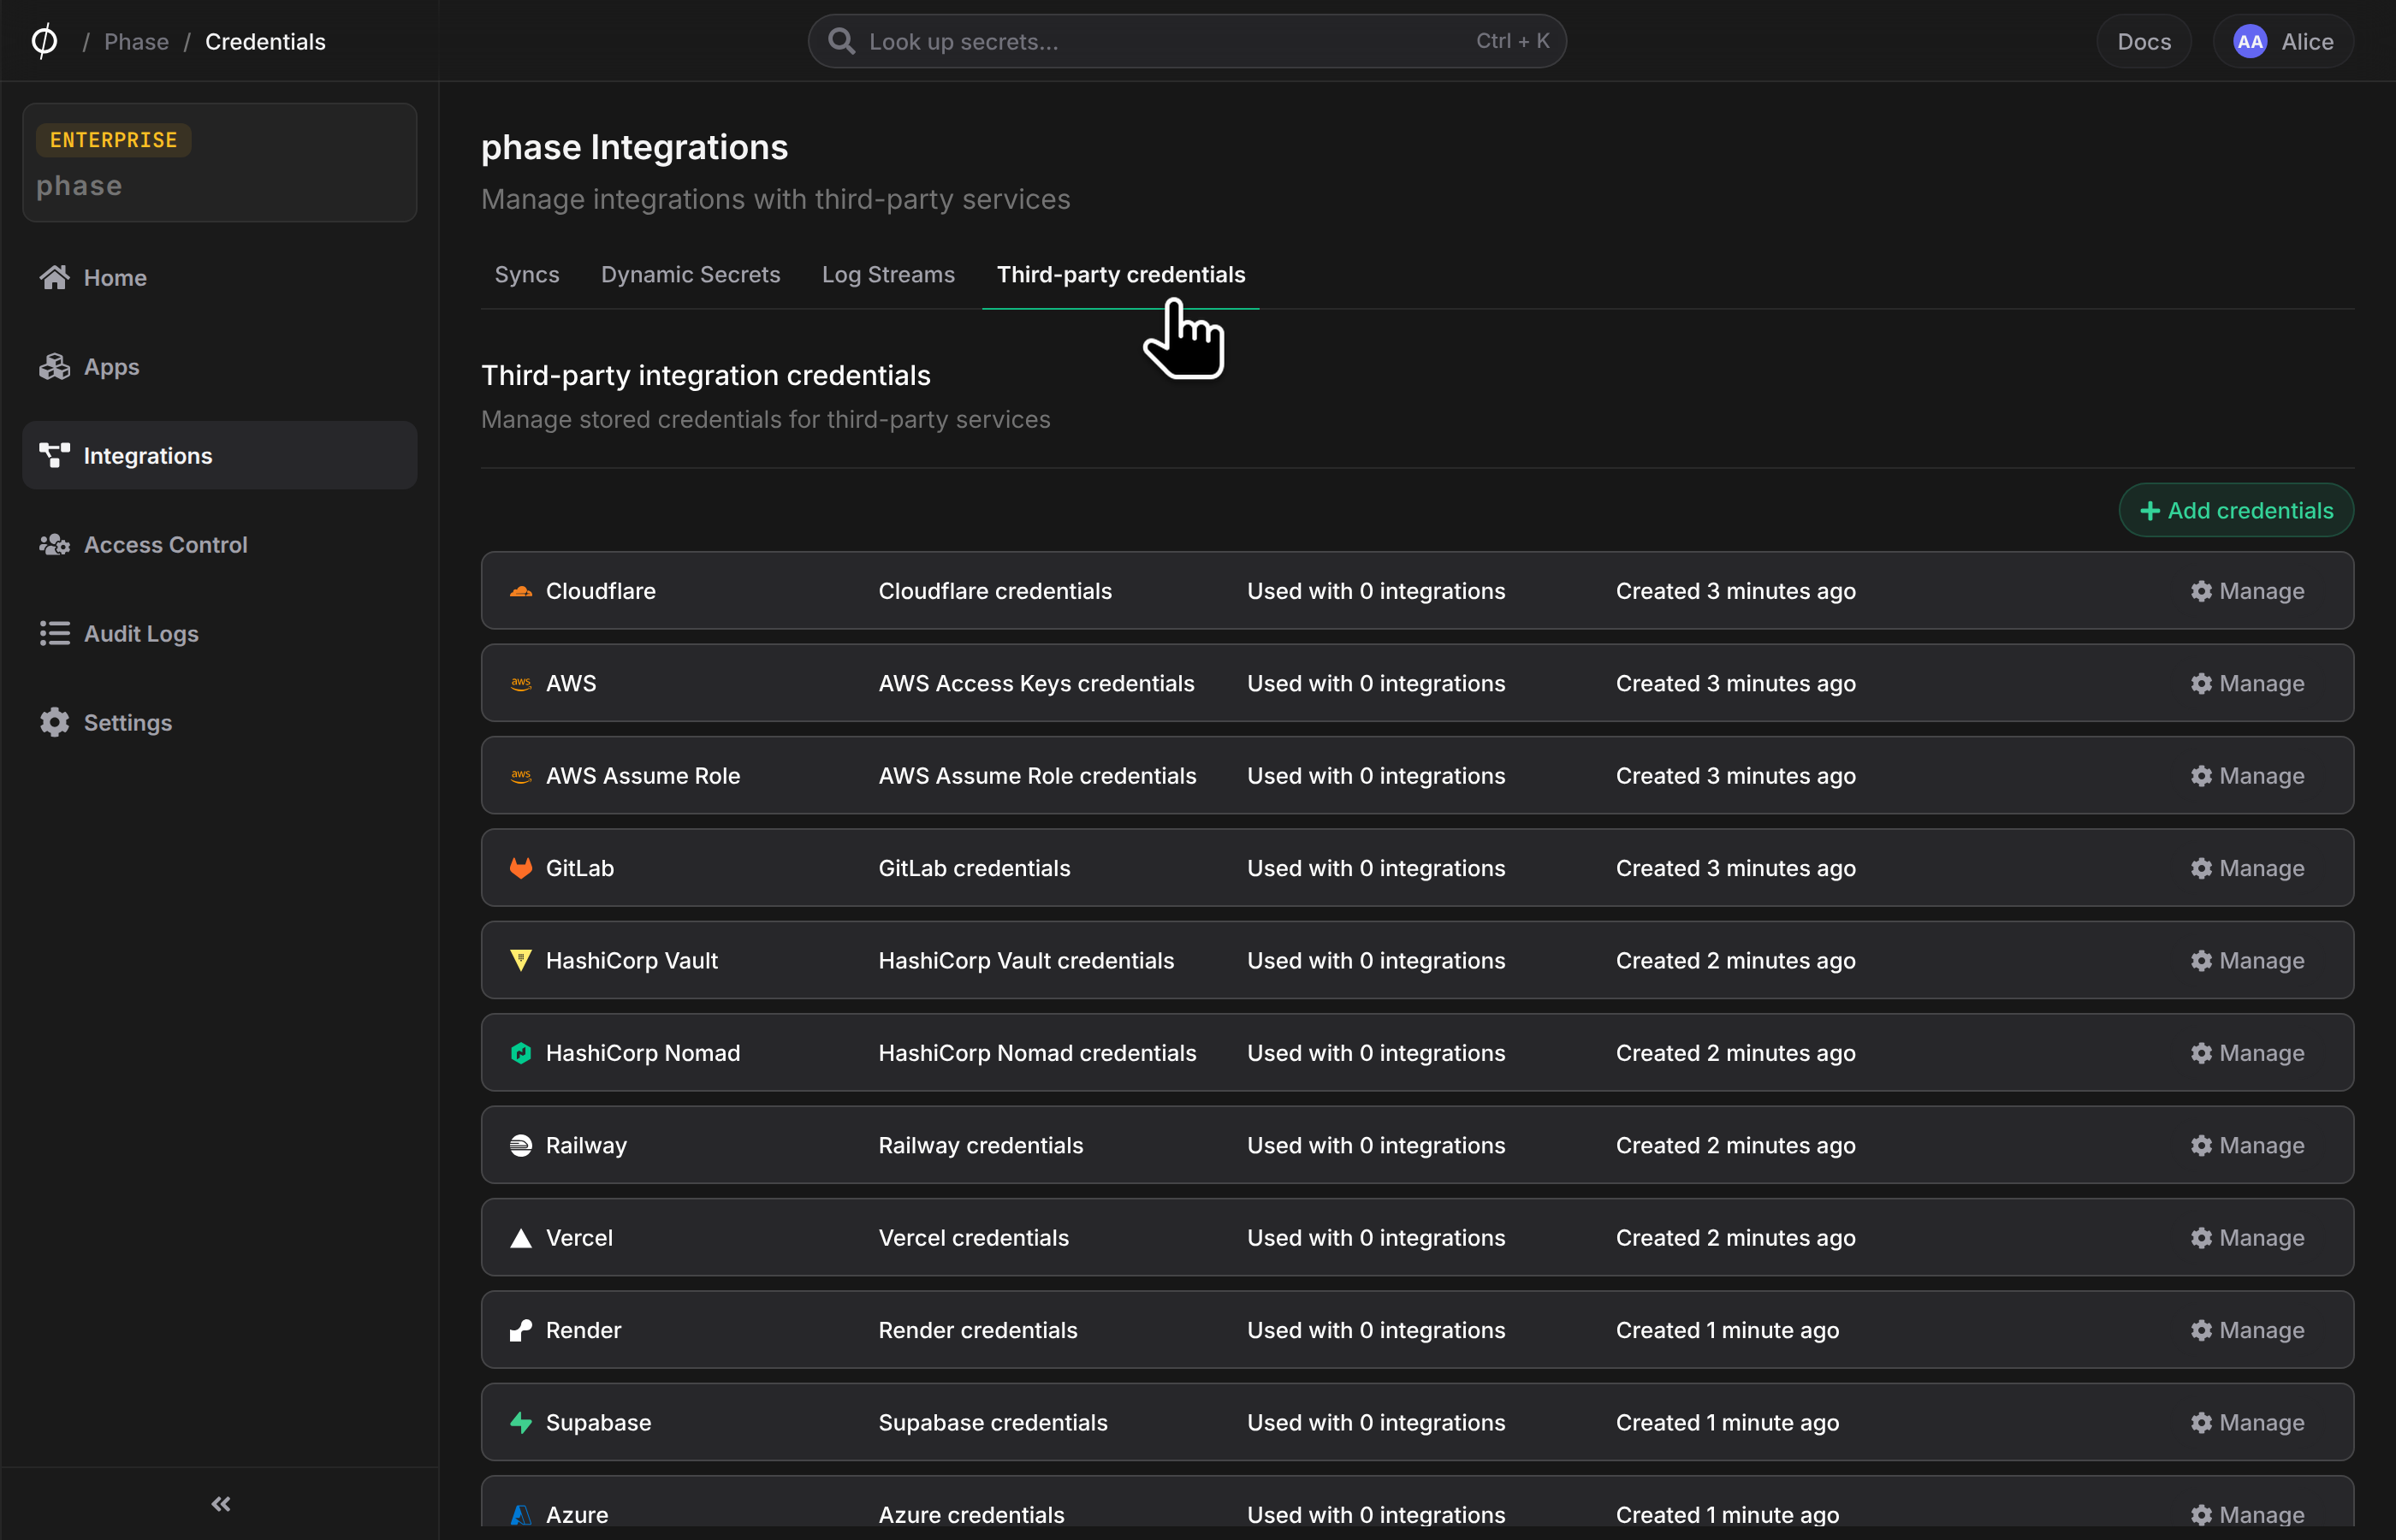
- Go to Integrations from the sidebar and click on Third-party credentials in the integrations tab.
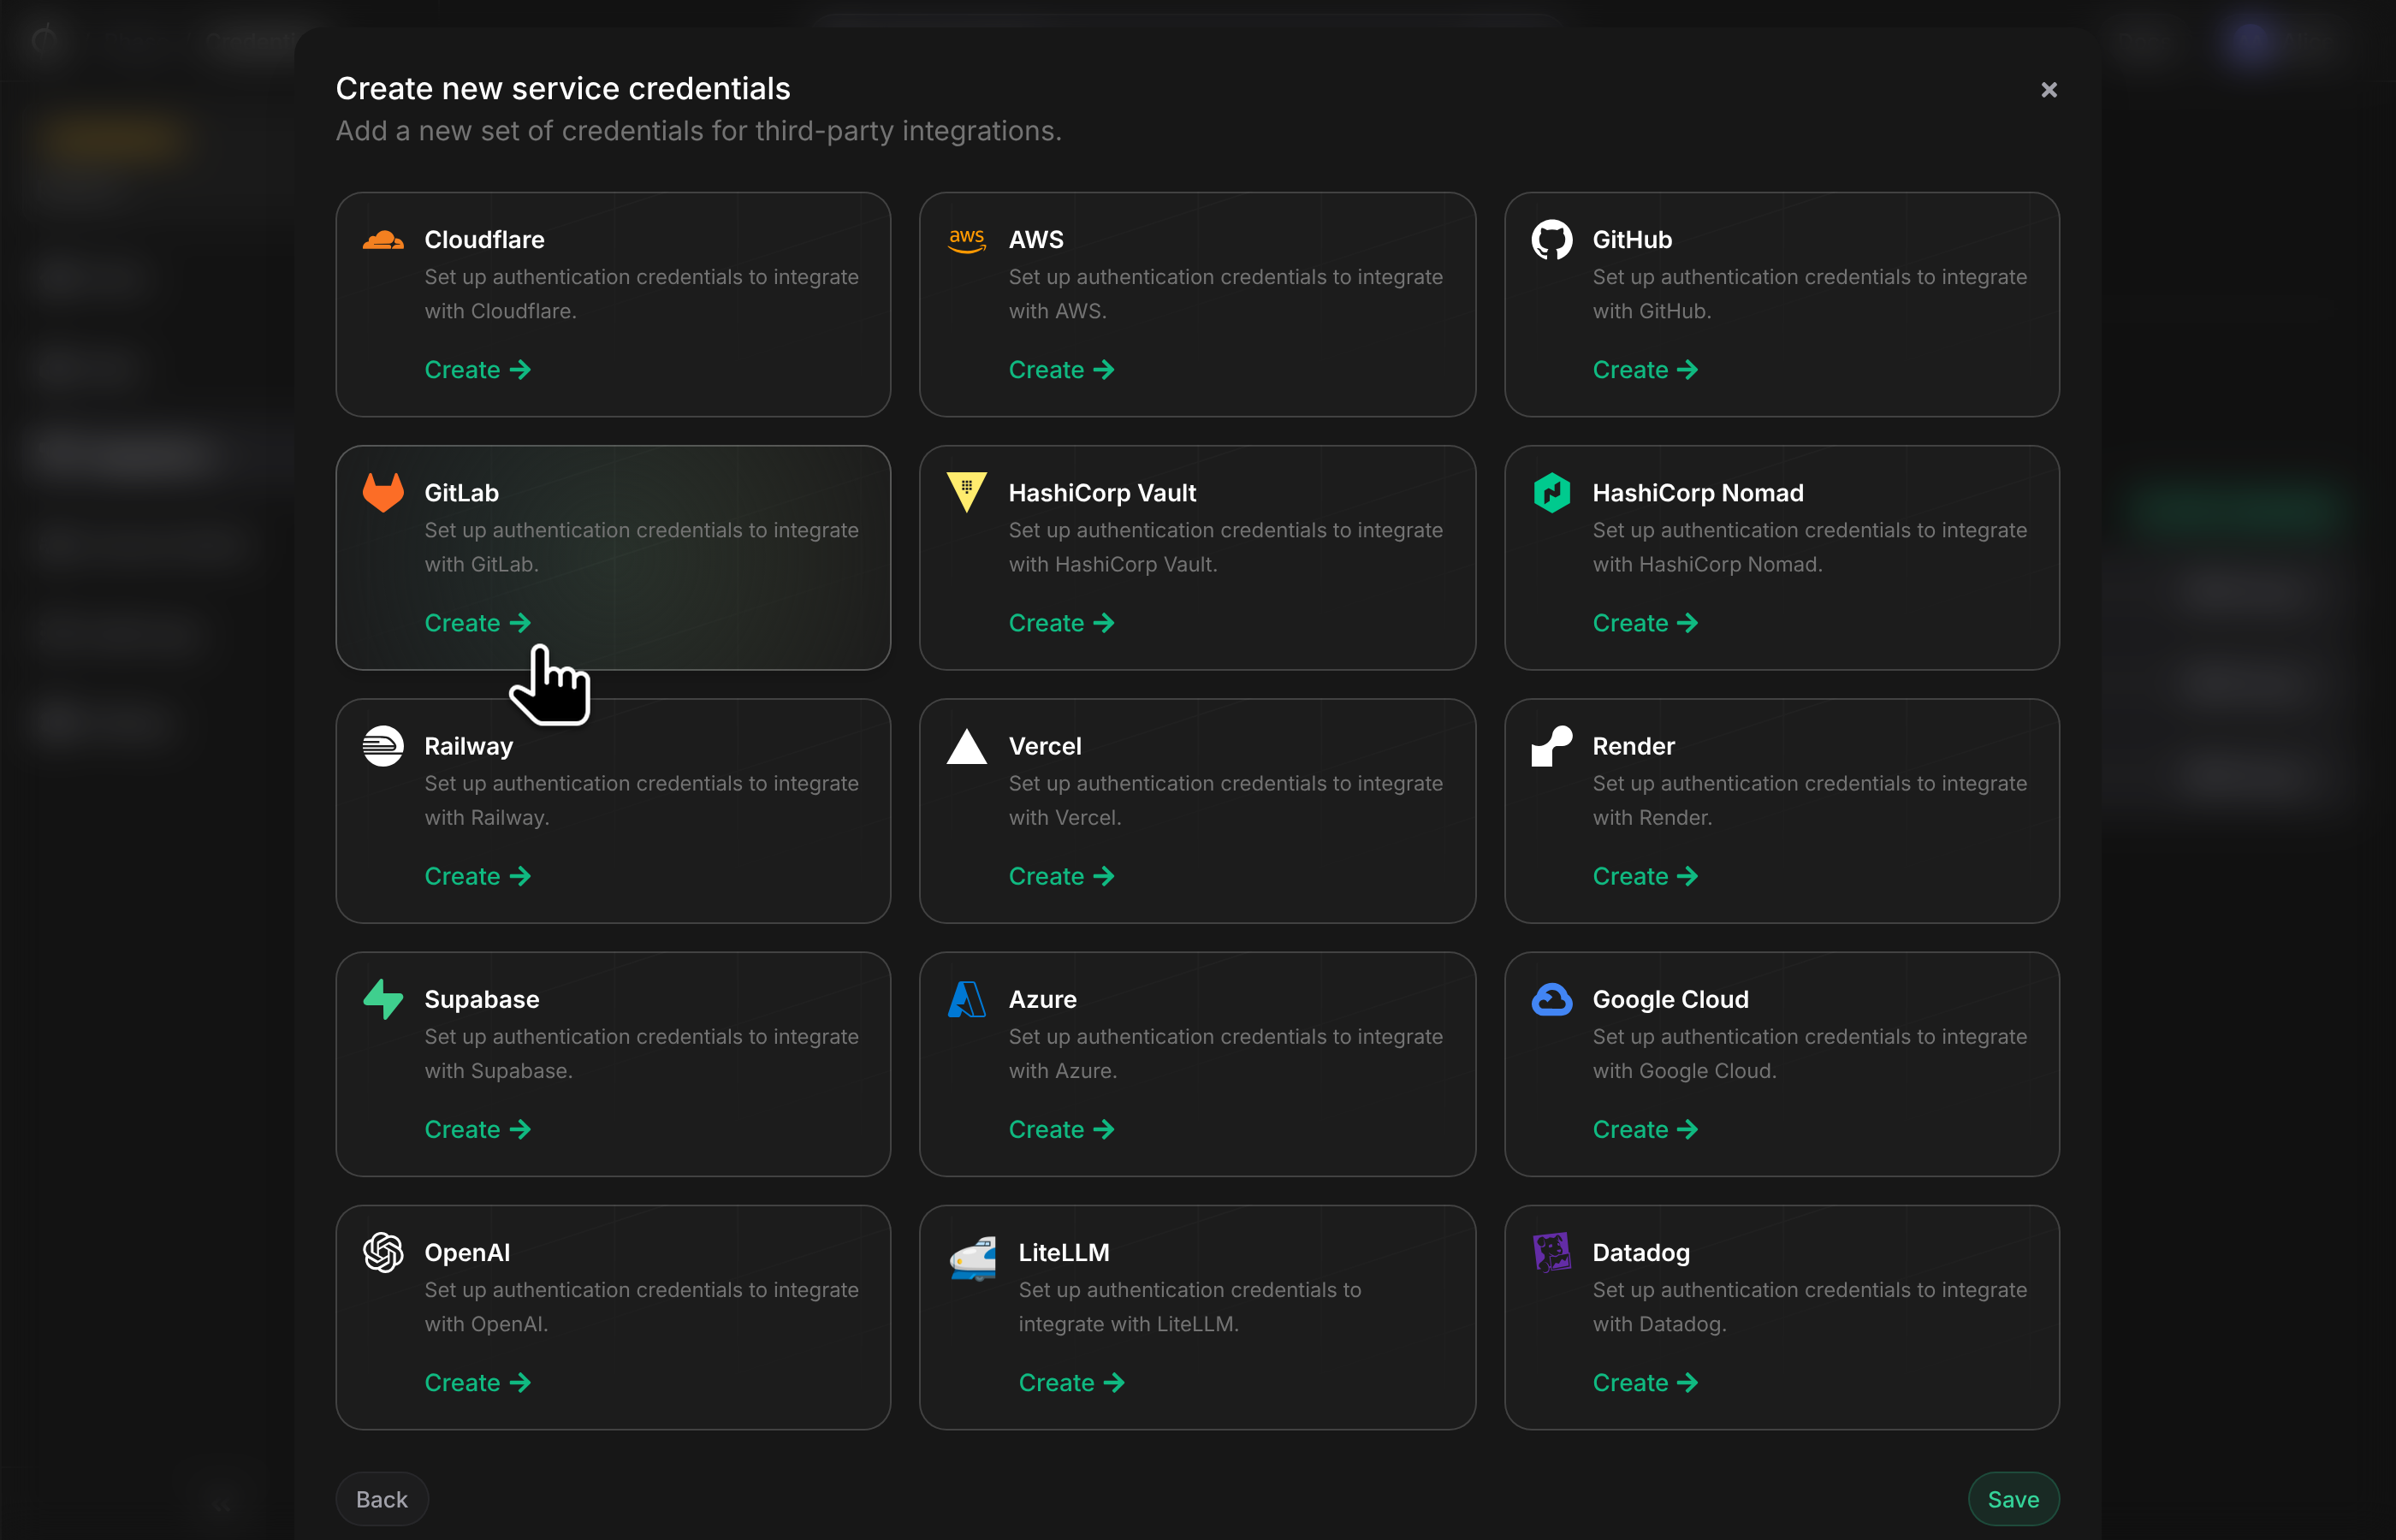
- Click on GitLab
- Enter your GitLab instance host (use
https://gitlab.comfor GitLab.com) and token. Enter a descriptive name for these credentials and click Save
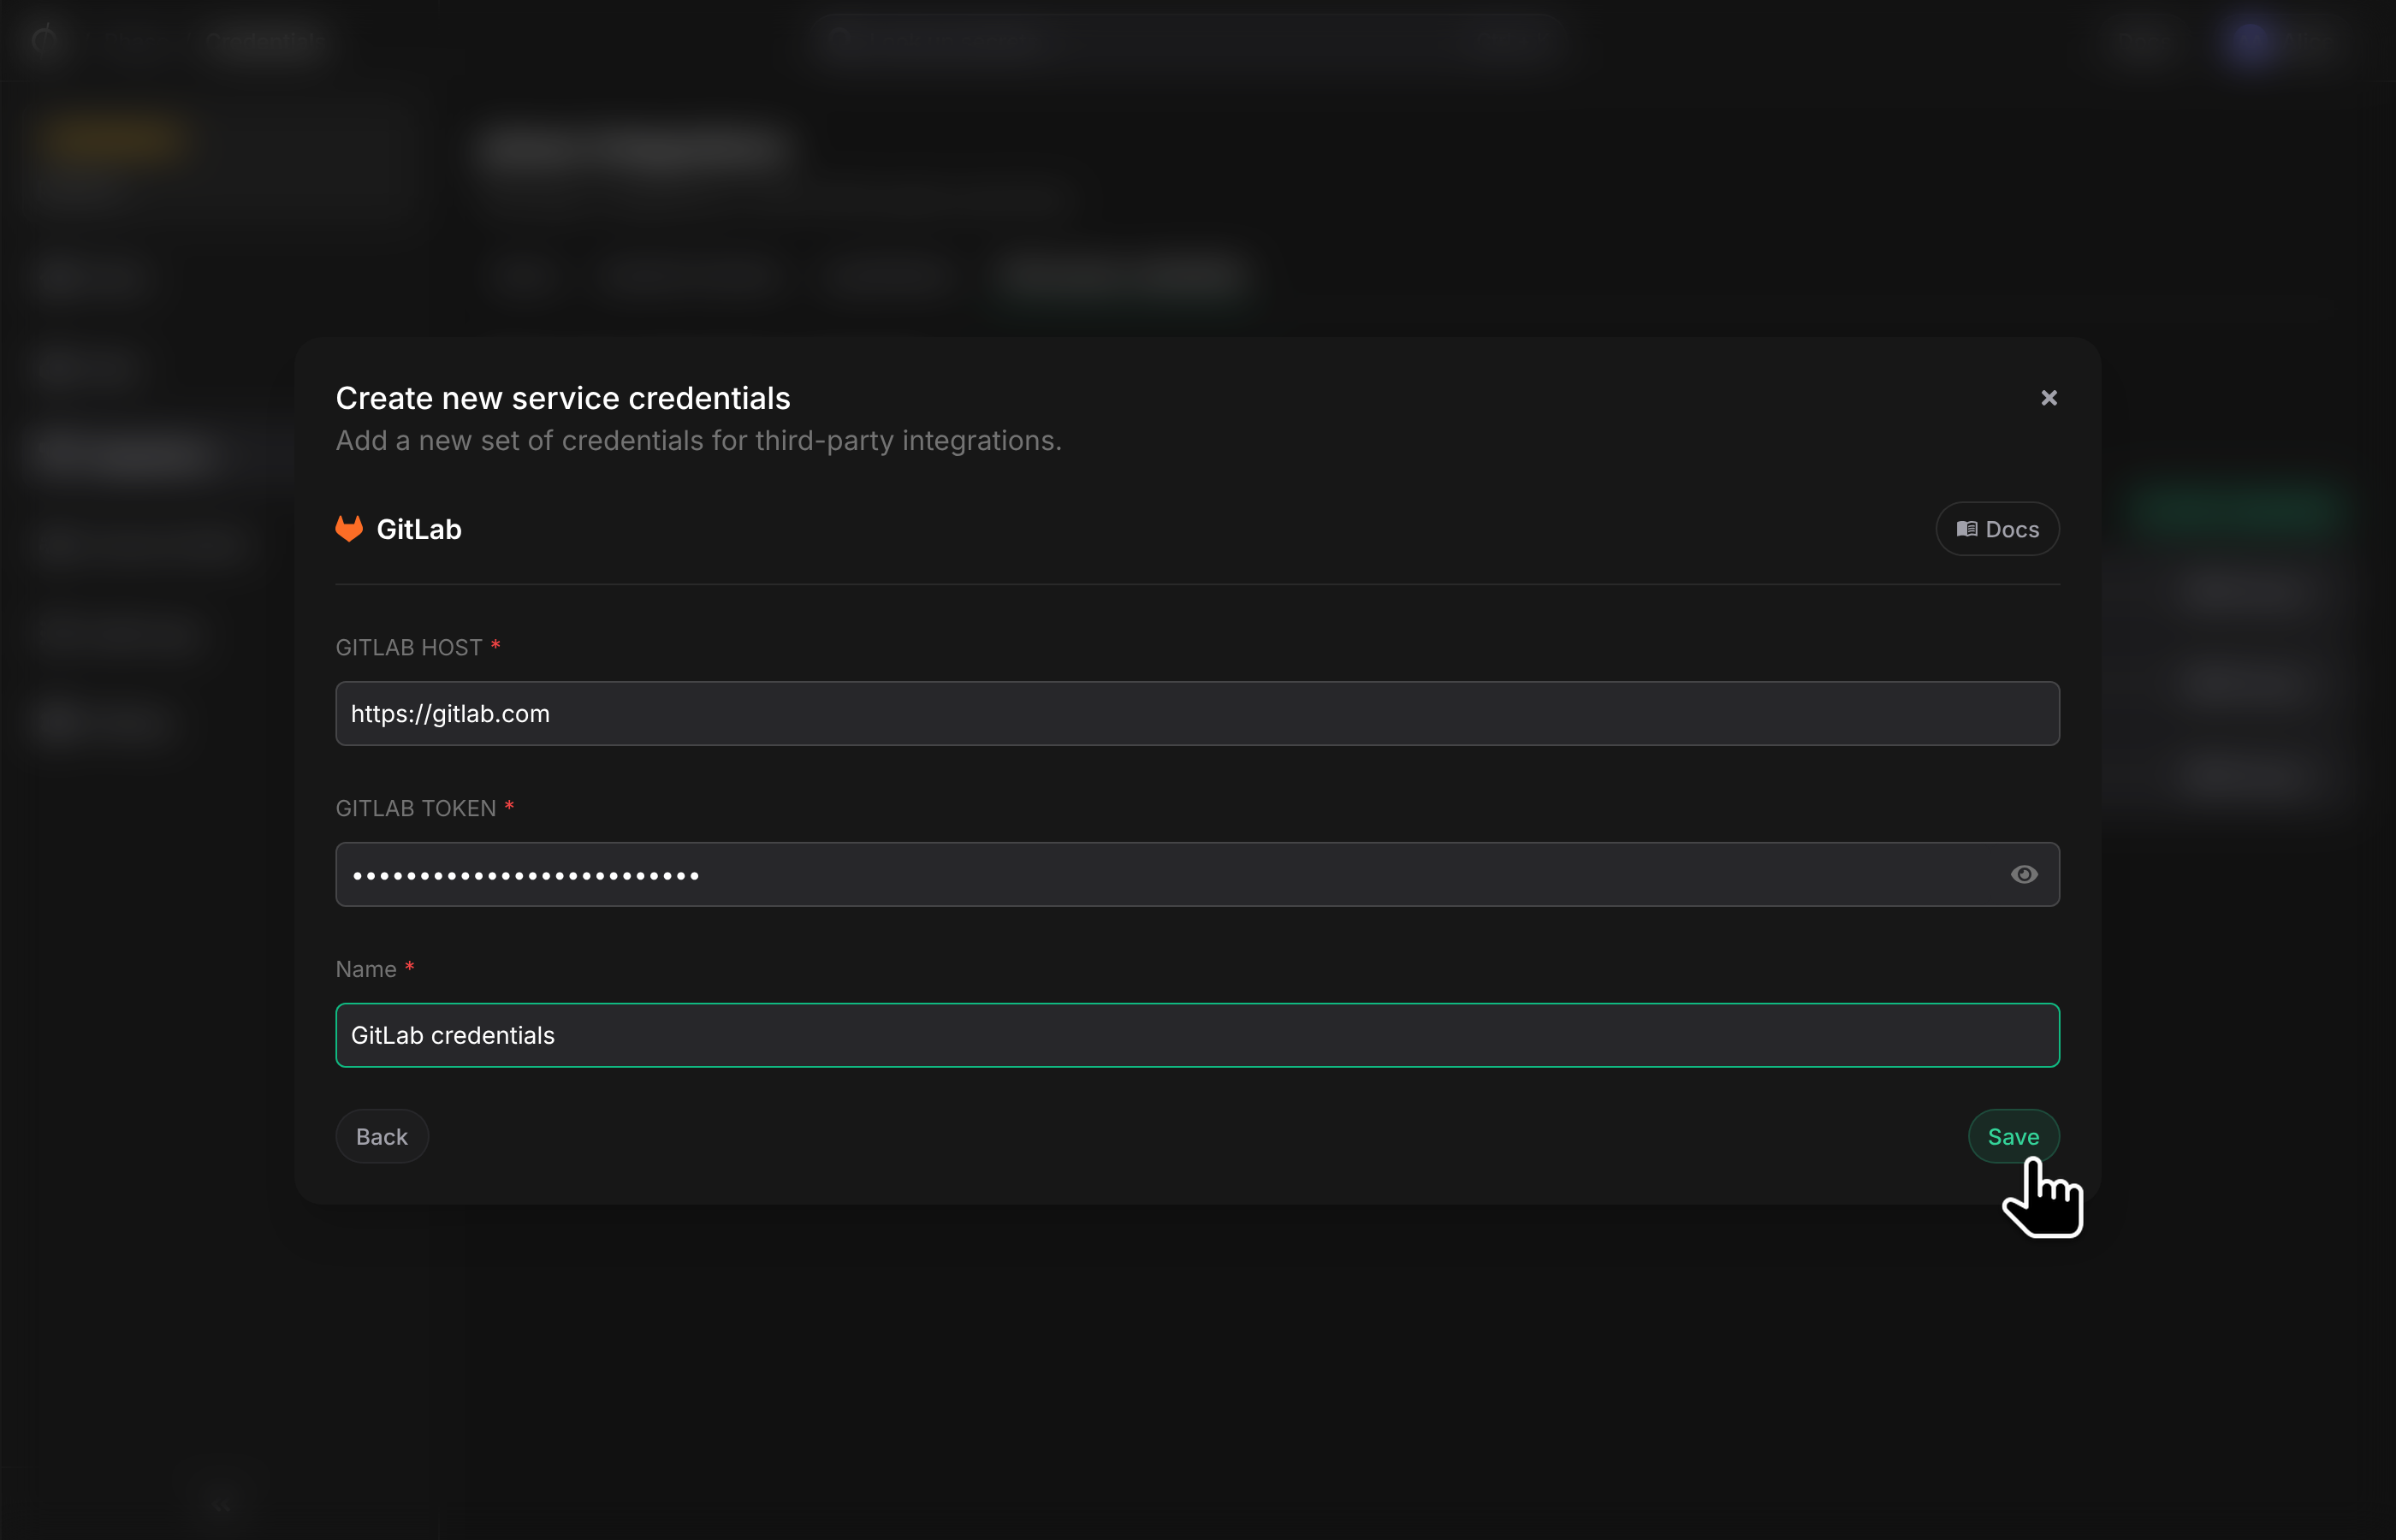
Your credentials will be encrypted and saved. You can view and manage these credentials under Service Credentials in the Integrations screen.
Step 2: Configure Sync
Now that you have authenticated with GitLab, you can configure syncs for your app.
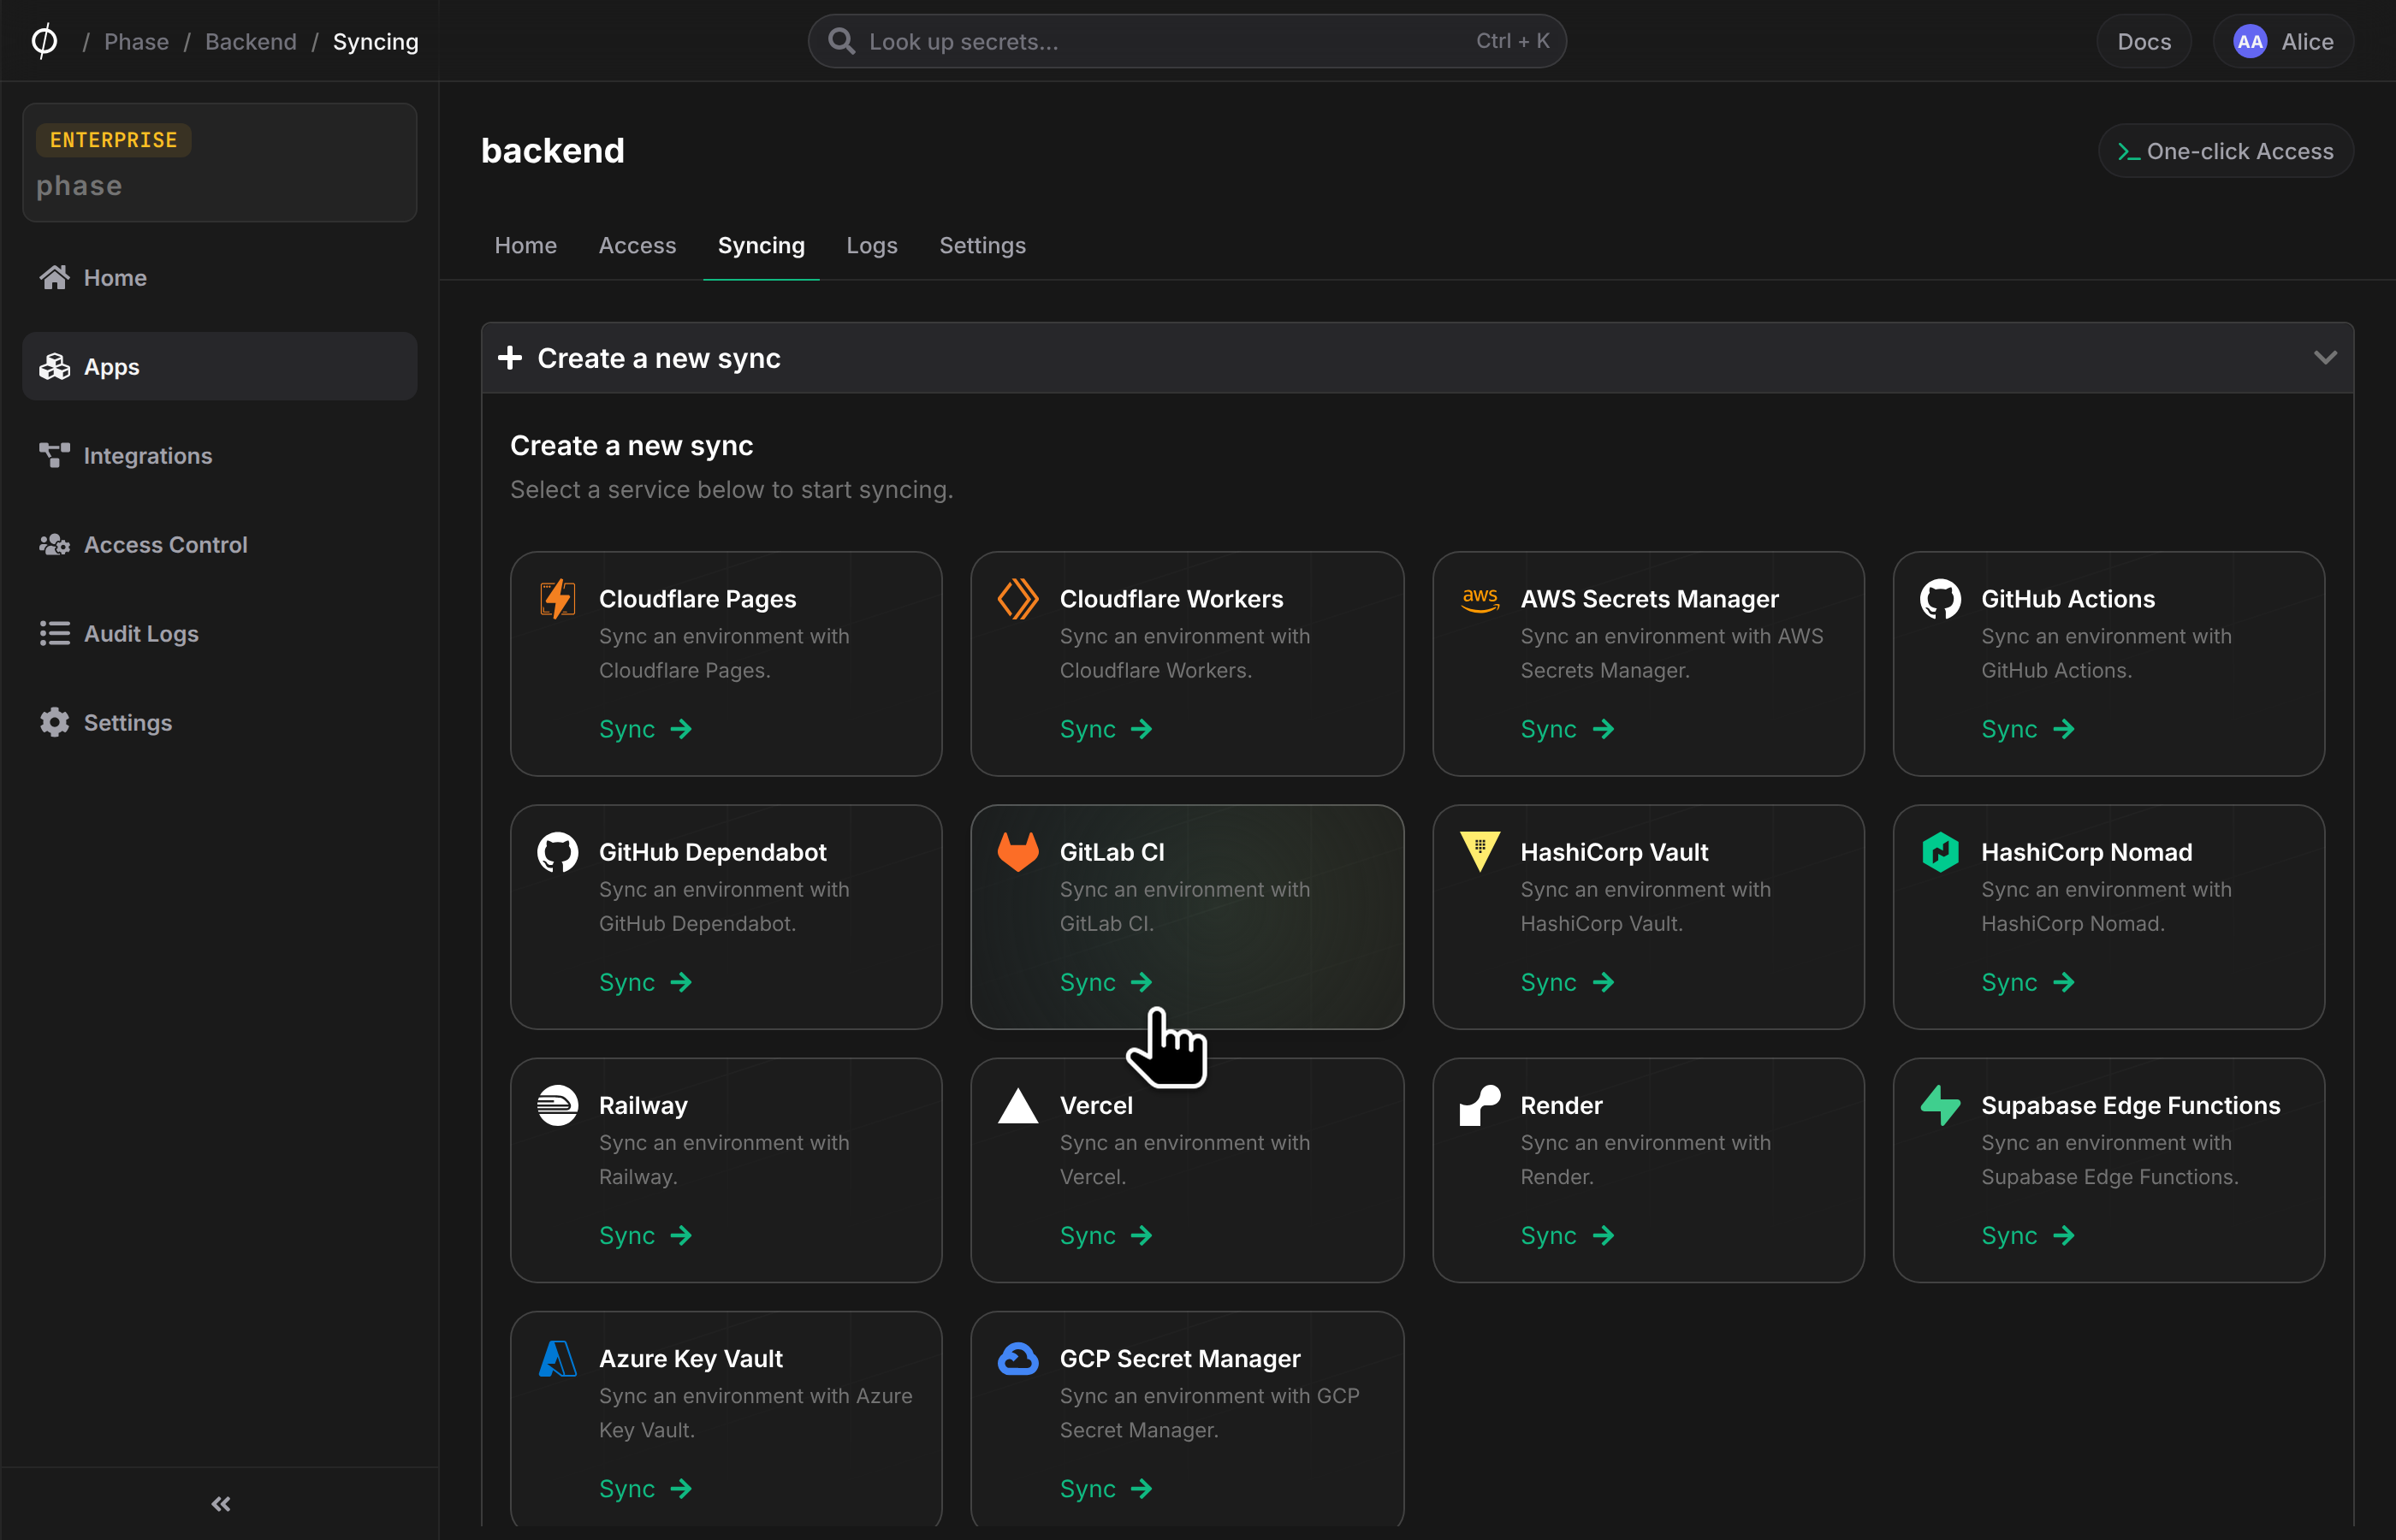
- Go to your App in the Phase Console and go to the Syncing tab. Select GitLab CI under the 'Create a new Sync' menu.
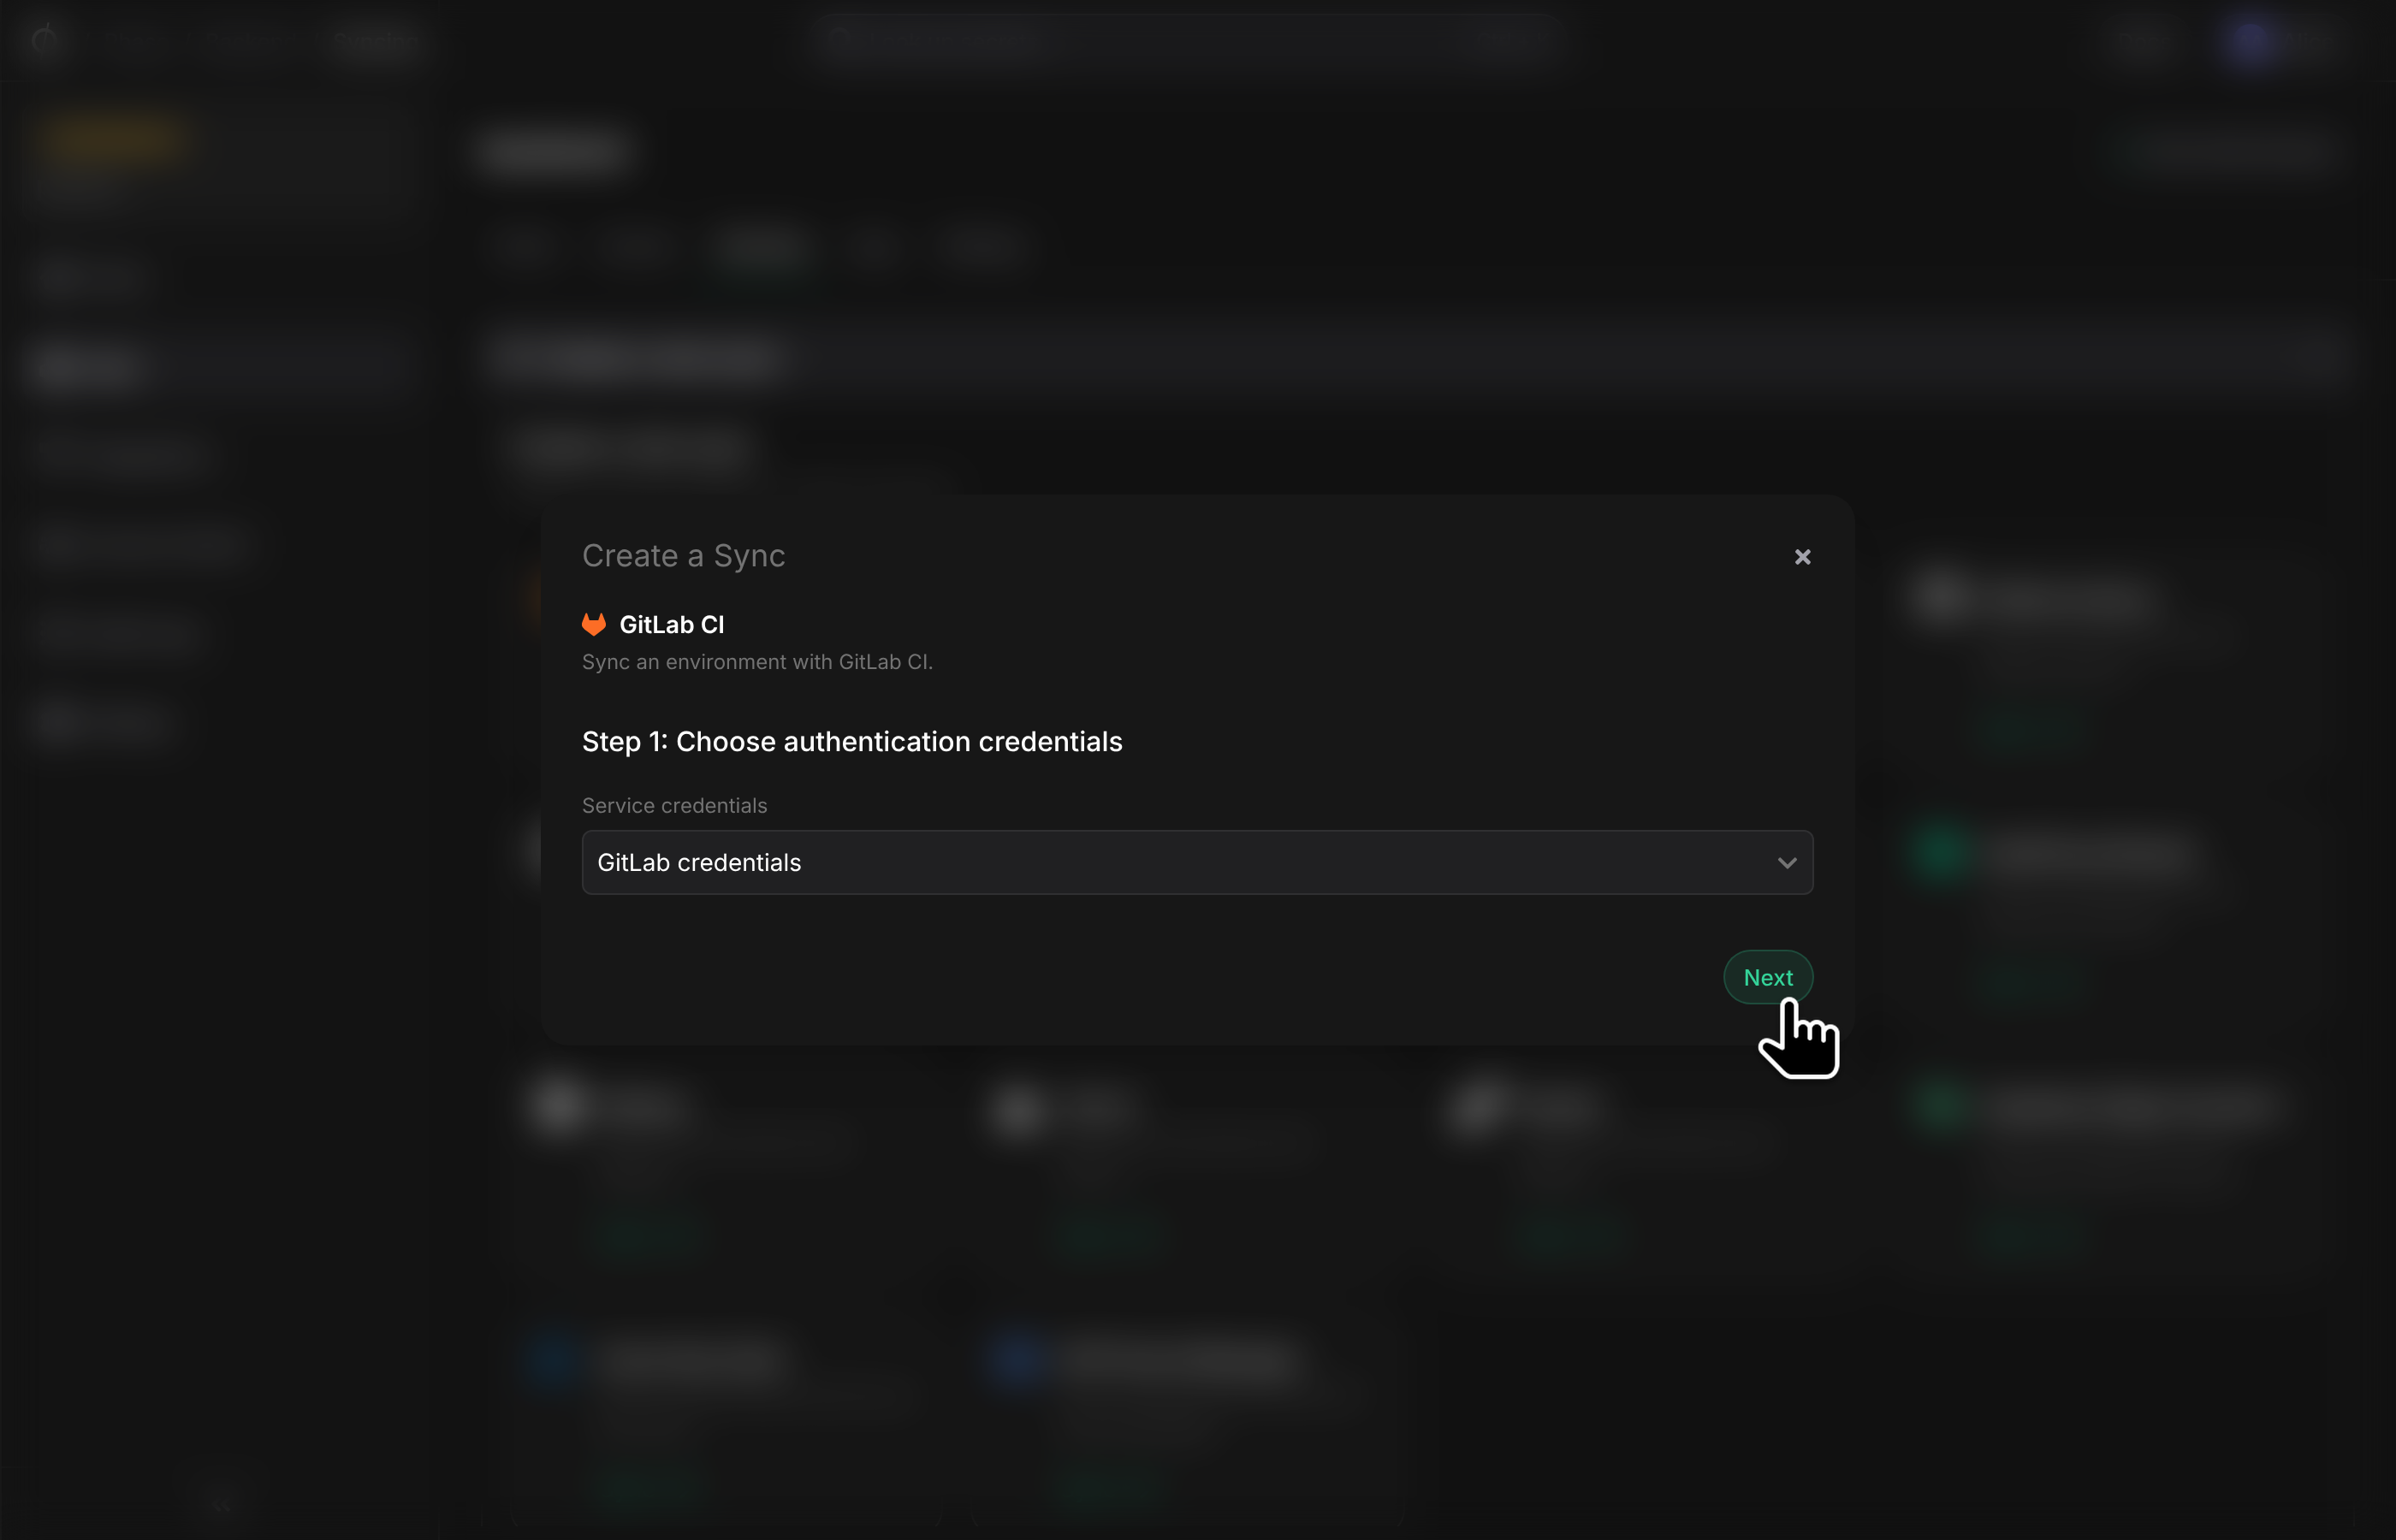
- Select the credentials stored in the previous step as the authentication method for this sync, and click Next.
-
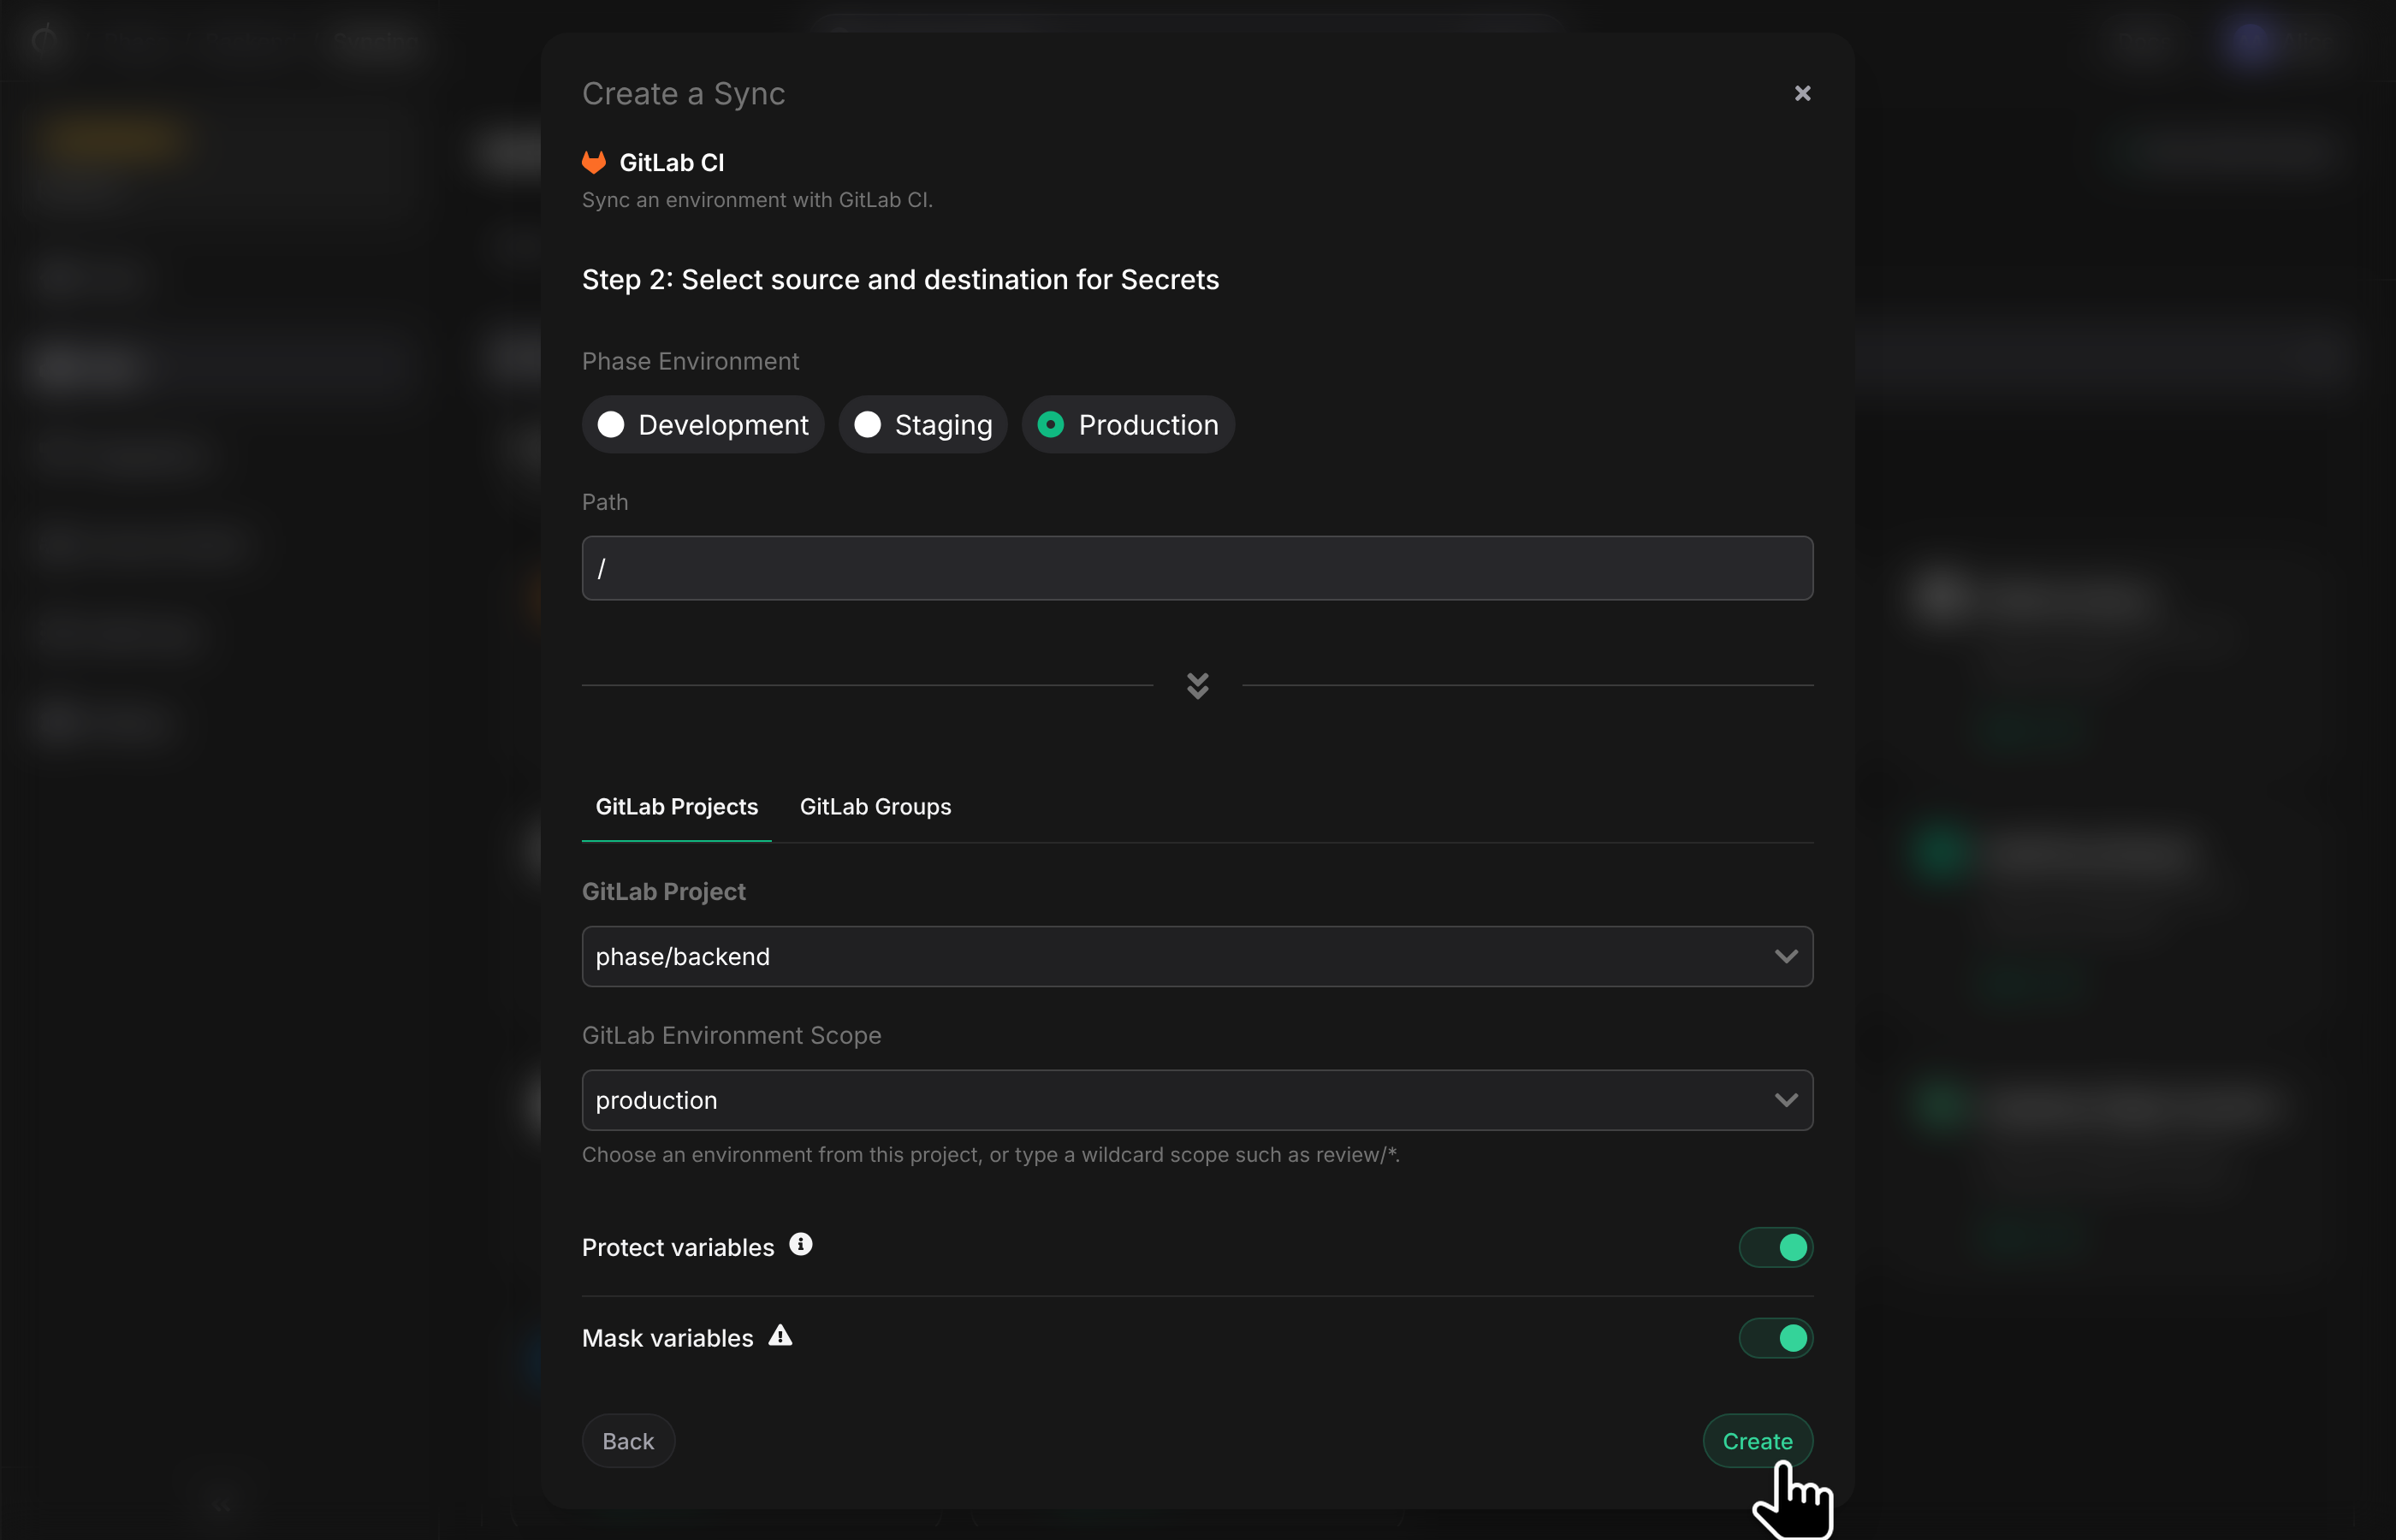
Choose the source and destination to sync secrets. Select an Environment as the source for Secrets. Next, choose a GitLab Project or GitLab Group from the dropdown as the destination to sync Secrets to.
Then choose a GitLab Environment Scope. By default, secrets are synced to the
*scope (All environments) and are available to every job in your pipelines. To make secrets available only to a specific GitLab environment, select a scope from the dropdown, or type any environment scope, including wildcards such asreview/*. For a project, the dropdown lists the project's environments. Groups don't have environments, so for a group it lists the scopes that the group's variables already use. See Environment scopes for details.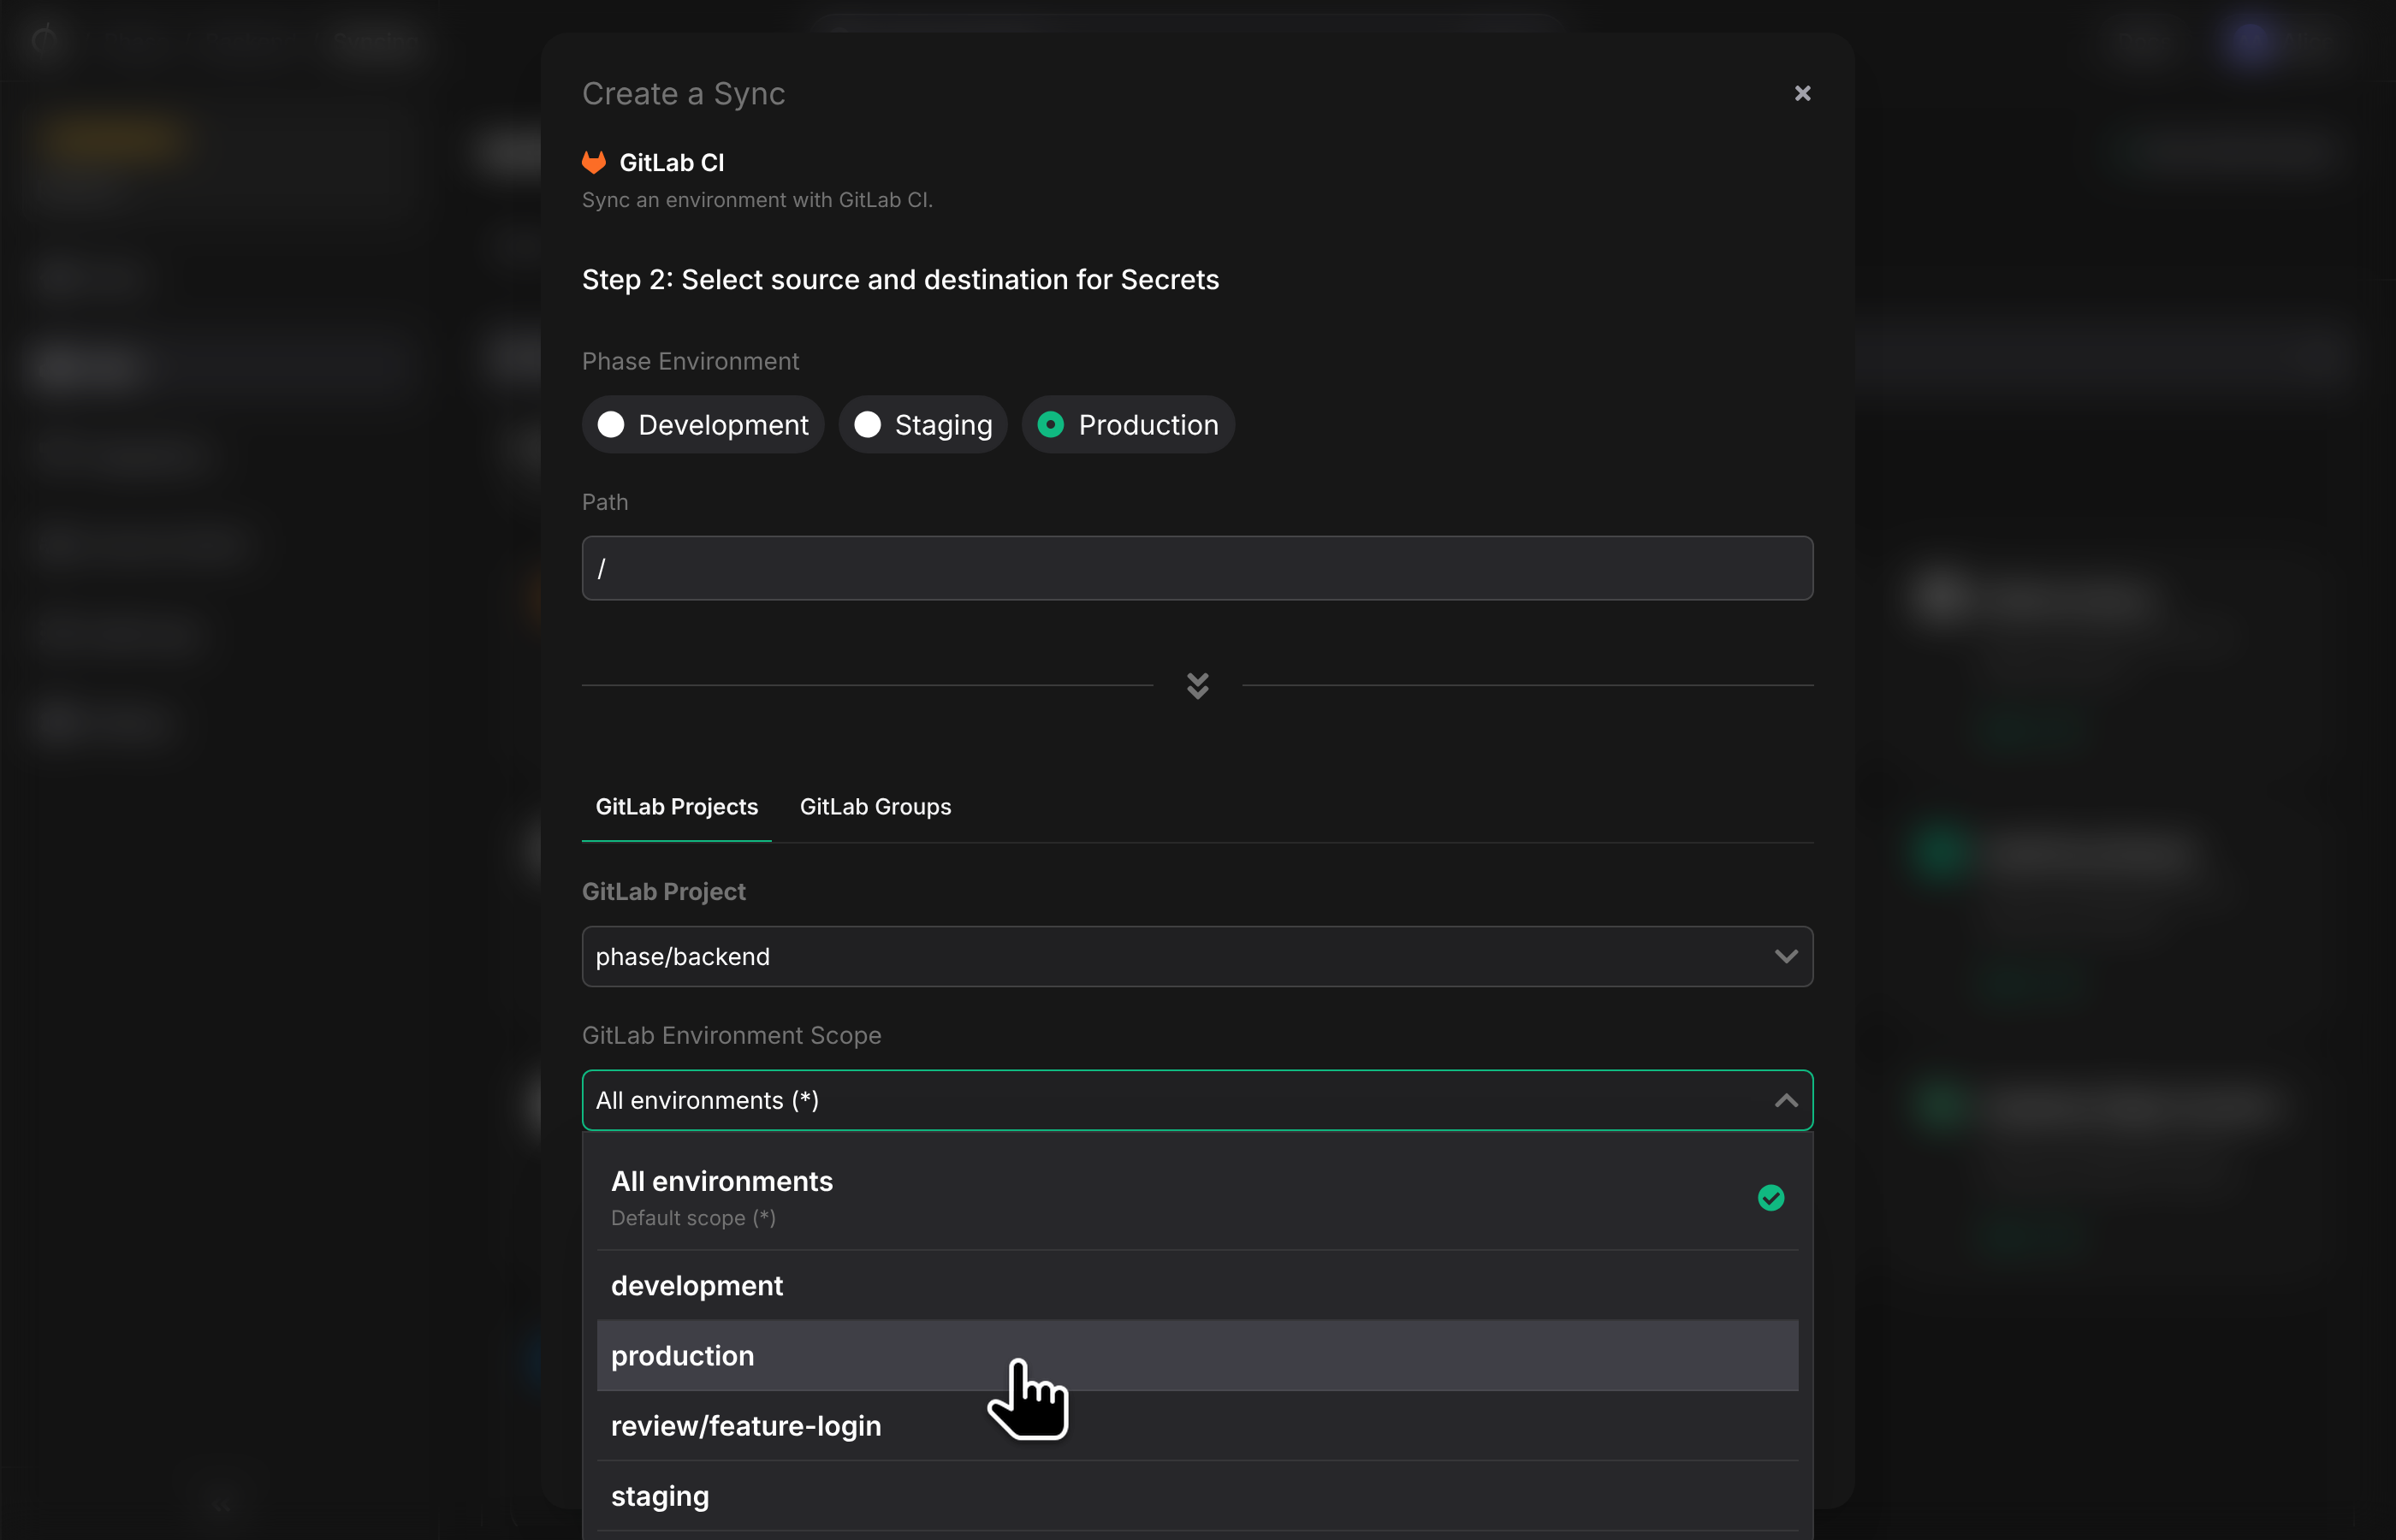
You can optionally also choose to mask and/or protect secrets synced to GitLab.
Masked variables must meet the following criteria in GitLab. If any secrets in the selected environment and path do not meet these requirements, the sync will fail.
Masked variables must:
- Be a single line.
- Be 8 characters or longer.
- Not match the name of an existing predefined or custom CI/CD variable.
Additionally, if variable expansion is enabled, the value can contain only:
- Characters from the Base64 alphabet (RFC4648).
- The @, :, ., or ~ characters.
-
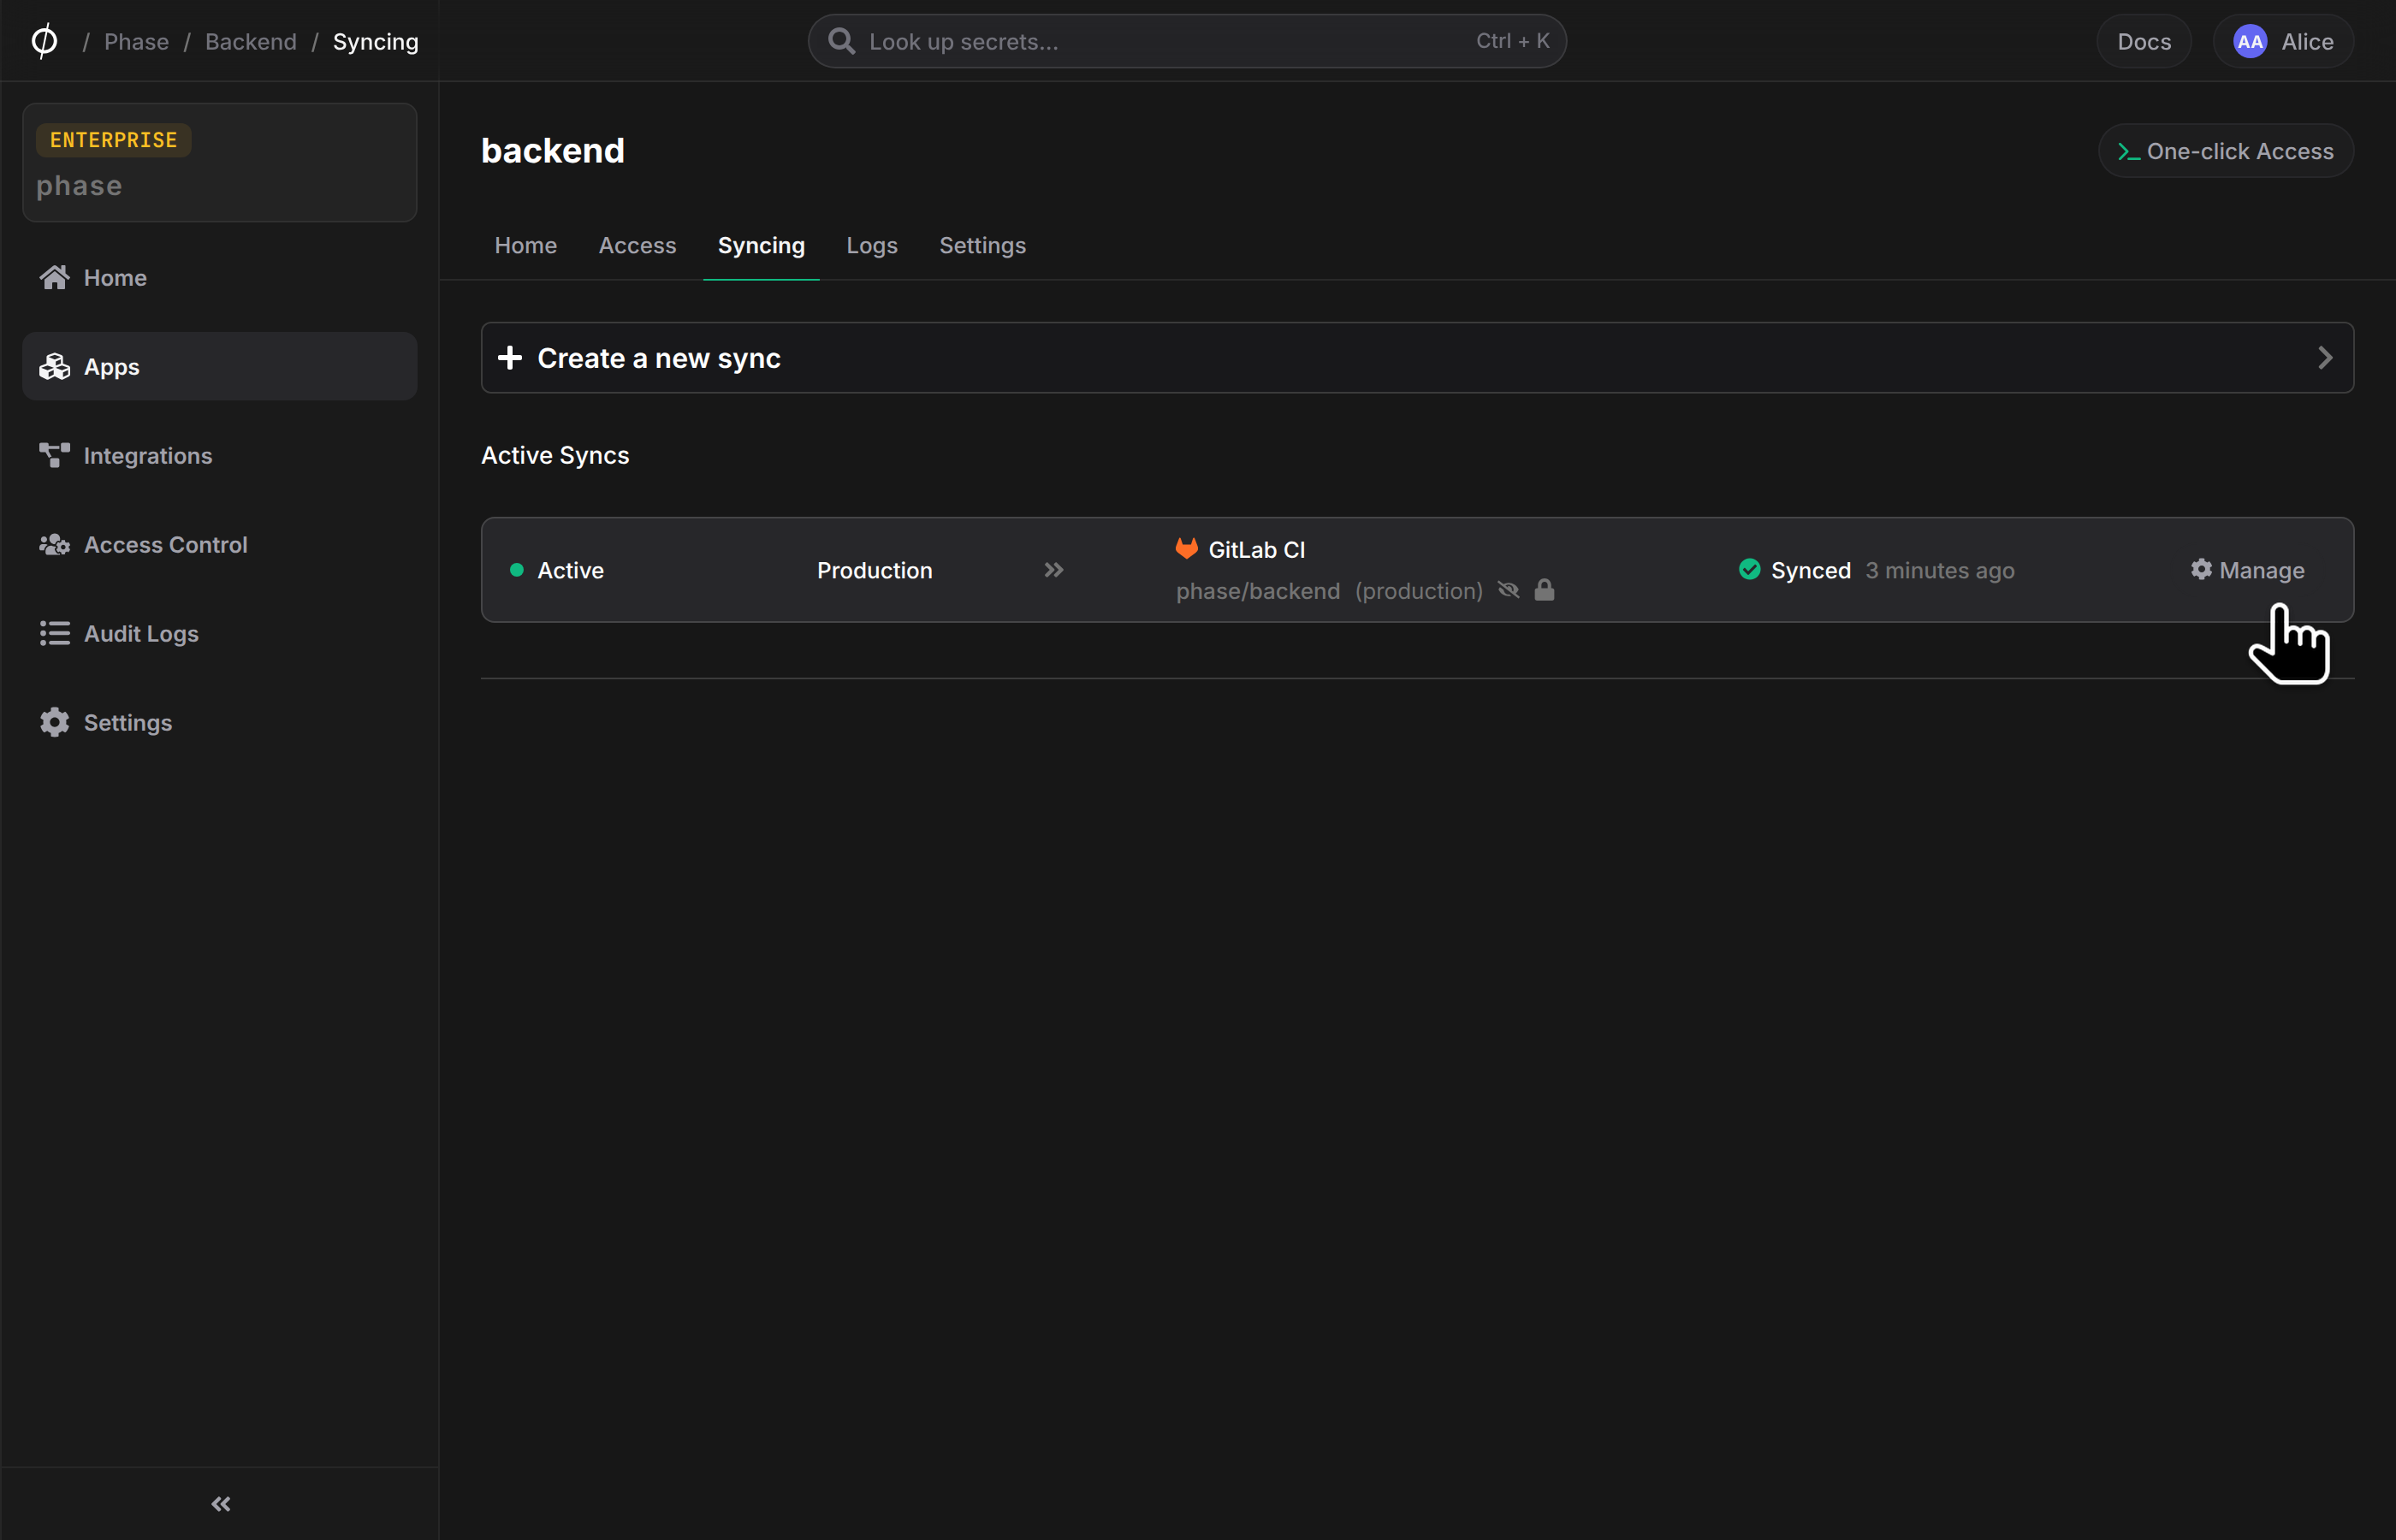
Once you have selected your desired source and destination, click Create. The sync has been set up! Secrets will automatically be synced from your chosen Phase Environment to the GitLab Project or Group as CI/CD variables. You can click on the Manage button on the Sync card to view sync logs, pause syncing, or update authentication credentials.
Environment scopes
GitLab CI/CD variables can be limited to an environment with an environment scope. Variables in the default * scope are available to every job. Variables in any other scope are only available to jobs that deploy to a matching environment, and if the same key exists in more than one matching scope, GitLab uses the most specific one.
Each GitLab sync manages the variables in a single environment scope:
- It creates, updates and deletes the variables in its scope to match the secrets in the Phase Environment.
- Variables in other scopes are left untouched, even if they have the same key.
Syncs created before environment scopes were available don't have an
environment scope. They keep syncing to all environments (*) as before, and
keep updating variables that were moved to another environment scope in
GitLab. To use environment scopes with the same GitLab project or group,
delete such a sync first and create it again with an environment scope. If
you had moved some of its variables to other scopes in GitLab, also create a
sync for each of those scopes, or delete those variables: the new sync only
updates variables in its own scope, so they would keep their old values.
If a secret has variables in several environment scopes in GitLab, such a sync may not be able to tell which one to update or delete. It still syncs new and changed secrets, but then deletes no variables and fails with an error that names those secrets, until only one variable is left for each of them or the sync is created again with an environment scope.
This lets you sync each Phase Environment to the matching environment in the same GitLab project. For example:
| Phase Environment | GitLab Environment Scope |
|---|---|
| Development | review/* |
| Staging | staging |
| Production | production |
You can also combine a sync to the default * scope with syncs to specific environments. Jobs for those environments then use the scoped value of a variable, and every other job uses the value from the * scope.
To use secrets that are scoped to an environment, set the environment of the job that needs them:
deploy_staging:
  stage: deploy
  environment: staging
  script:
    - ./deploy.sh # Secrets synced to the staging scope are available here

deploy_production:
  stage: deploy
  environment: production
  script:
    - ./deploy.sh # Secrets synced to the production scope are available here
An App can only have one sync per GitLab project or group and environment scope, since two syncs to the same scope would overwrite each other's variables.
Environment scopes for group variables require GitLab Premium or
Ultimate. On other tiers, GitLab ignores the scope and makes the variable
available to every environment. If this happens, Phase removes the variable
again and the sync fails with an error, so scoped secrets are never exposed
to all environments. Use a project sync or the default * scope instead.
Using the Phase CLI
Fetch secrets directly inside your GitLab CI pipeline during runtime without storing them in GitLab.
Prerequisites
- Sign up for the Phase Console and create an App.
PHASE_SERVICE_TOKEN
If you are using a Self-Hosted instance of the Phase Console, you may supply
the PHASE_HOST environment variable with your URL (https://<HOST>).
For detailed CLI install options, please see: Installation
Setting PHASE_SERVICE_TOKEN:
- Navigate to your project in GitLab.
- Go to
Settings>CI/CD. - Under
Variables, click onExpand. - Click on
Add Variable. - Enter the key as
PHASE_SERVICE_TOKENand your secret as the value. Save it.
Example:
Pin the CLI to a specific version with the --version flag for reproducible builds — find the latest version on the Phase CLI releases page.
stages:
  - prepare
  - build_and_push

prepare_phase_cli:
  stage: prepare
  script:
    - curl -fsSL https://pkg.phase.dev/install.sh | sh -s -- --version <X.XX.XX>
    - export $(phase secrets export --app "my application name" --env prod DOCKERHUB_USERNAME DOCKERHUB_TOKEN | xargs)

build_and_push_image:
  stage: build_and_push
  script:
    - docker login -u $DOCKERHUB_USERNAME -p $DOCKERHUB_TOKEN
    - docker build -t my-image .
    - docker push my-image:latest
Using phasehq/cli Docker image:
stages:
  - prepare
  - build_and_push

prepare_phase_cli:
  image: phasehq/cli
  stage: prepare
  script:
    - secrets export --app "my application name" --env prod DOCKERHUB_USERNAME DOCKERHUB_TOKEN
  artifacts:
    untracked: true

build_and_push_image:
  stage: build_and_push
  script:
    - docker login -u $DOCKERHUB_USERNAME -p $DOCKERHUB_TOKEN
    - docker build -t my-image .
    - docker push my-image:latest